Dell Studio XPS 13 Setup Guide - Page 21
Using the Optical Disc Drive, NOTICE
 |
UPC - 883685979287
View all Dell Studio XPS 13 manuals
Add to My Manuals
Save this manual to your list of manuals |
Page 21 highlights
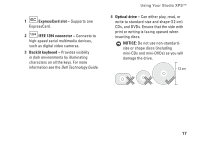
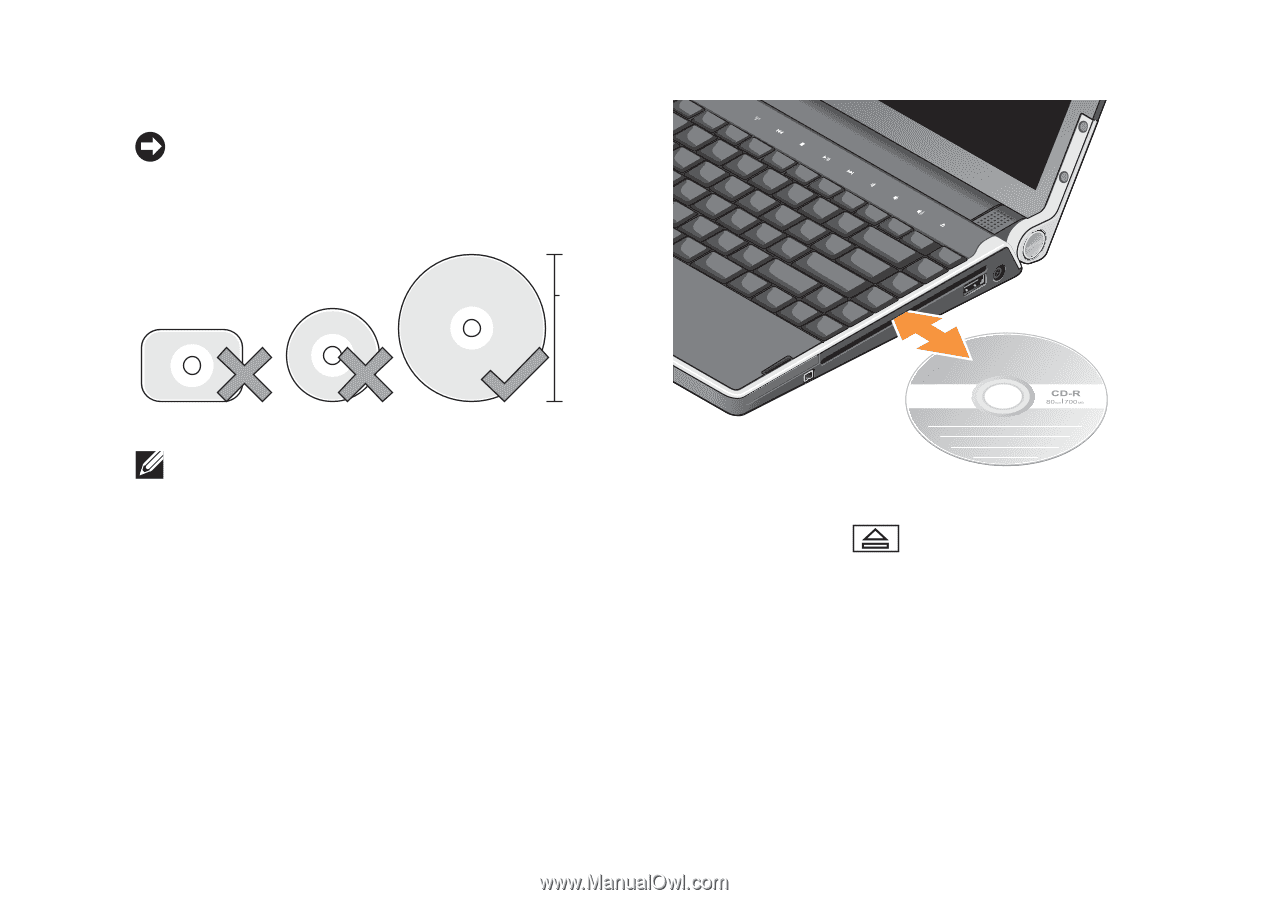
Using the Optical Disc Drive NOTICE: Do not use non-standard-size or shape discs (including mini-CDs and miniDVDs) as you will damage the drive. 12 cm Using Your Studio XPS™ NOTE: Do not move the computer while playing or recording CDs and DVDs. Place the disc in the center of the disc slot, with the label facing upwards and gently push the disc into the slot. The drive will automatically pull the disc in and begin reading its content. To eject a disc from the drive, gently touch the eject control . The control will flash to confirm for a few seconds before ejecting the disc. 19
-
 1
1 -
2
-
3
-
4
-
5
-
6
-
7
-
8
-
9
-
10
-
11
-
12
-
13
-
14
-
15
-
 16
16 -
 17
17 -
 18
18 -
 19
19 -
 20
20 -
 21
21 -
 22
22 -
 23
23 -
 24
24 -
 25
25 -
 26
26 -
27
-
28
-
29
-
30
-
31
-
32
-
33
-
34
-
35
-
36
-
37
-
38
-
39
-
40
-
41
-
42
-
43
-
44
-
45
-
46
-
47
-
48
-
49
-
50
-
51
-
52
-
53
-
54
-
55
-
56
-
57
-
58
-
59
-
60
-
61
-
62
-
63
-
64
-
65
-
66
-
67
-
68
-
69
-
70
-
71
-
72
-
73
-
74
 |
 |
19
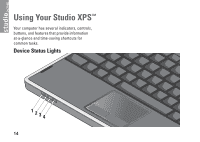
Using Your Studio XPS™
Using the Optical Disc Drive
NOTICE:
Do not use non-standard-size or
shape discs (including mini-CDs and mini-
DVDs) as you will damage the drive.
12 cm
NOTE:
Do not move the computer while
playing or recording CDs and DVDs.
Place the disc in the center of the disc slot, with
the label facing upwards and gently push the
disc into the slot. The drive will automatically
pull the disc in and begin reading its content.
To eject a disc from the drive, gently touch
the eject control
. The control will flash
to confirm for a few seconds before ejecting
the disc.