Dell V505 All In One Inkjet Printer User's Guide - Page 122
Scanning Multi- Documents Using the ADF
 |
View all Dell V505 All In One Inkjet Printer manuals
Add to My Manuals
Save this manual to your list of manuals |
Page 122 highlights
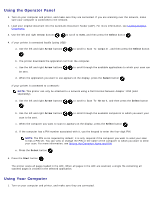
b. Use the left and right Arrow buttons be sent. to scroll through the available computers to which your scan can c. When the computer you want to use appears on the display, press the Select button . d. If the computer has a PIN number associated with it, use the keypad to enter the four-digit PIN. NOTE: The PIN is not required by default; it is only required if the computer you want to send your scan to has a PIN set. You can view or change the PIN or the name of the computer to which you want to send your scan. e. Press the Select button . 5. Press the Start button . The printer scans the page. When the scan is complete, a file is created in the selected application. Using Your Computer 1. Turn on your computer and printer, and ensure that they are connected. 2. Load your original document or photo facedown on the scanner glass. For more information, see Loading Original Documents on the Scanner Glass. 3. In Windows Vista™: a. Click ® All Programs. b. Click Dell Printers. c. Click Dell V505. In Windows® XP or Windows 2000: Click Start® Programs or All Programs® Dell Printers® Dell V505. 4. Select Dell Imaging Toolbox. The Dell Imaging Toolbox dialog box opens. 5. From the Home screen, click Scan. The What are you scanning? dialog box opens. 6. Select the Photo option. If you want to scan a document without changing the text, and you do not want to make a PDF, selecting the Photo option scans the document as an image and sends it to the Library instead of your default word-processing application. 7. Click Start. Scanning Multi-Page Documents Using the ADF
-
 1
1 -
2
-
3
-
4
-
5
-
6
-
7
-
8
-
9
-
10
-
11
-
12
-
13
-
14
-
15
-
16
-
17
-
18
-
19
-
20
-
21
-
22
-
23
-
24
-
25
-
26
-
27
-
28
-
29
-
30
-
31
-
32
-
33
-
34
-
35
-
36
-
37
-
38
-
39
-
40
-
41
-
42
-
43
-
44
-
45
-
46
-
47
-
48
-
49
-
50
-
51
-
52
-
53
-
54
-
55
-
56
-
57
-
58
-
59
-
60
-
61
-
62
-
63
-
64
-
65
-
66
-
67
-
68
-
69
-
70
-
71
-
72
-
73
-
74
-
75
-
76
-
77
-
78
-
79
-
80
-
81
-
82
-
83
-
84
-
85
-
86
-
87
-
88
-
89
-
90
-
91
-
92
-
93
-
94
-
95
-
96
-
97
-
98
-
99
-
100
-
101
-
102
-
103
-
104
-
105
-
106
-
107
-
108
-
109
-
110
-
111
-
112
-
113
-
114
-
115
-
116
-
 117
117 -
 118
118 -
 119
119 -
 120
120 -
 121
121 -
 122
122 -
 123
123 -
 124
124 -
 125
125 -
 126
126 -
 127
127 -
128
-
129
-
130
-
131
-
132
-
133
-
134
-
135
-
136
-
137
-
138
-
139
-
140
-
141
-
142
-
143
-
144
-
145
-
146
-
147
-
148
-
149
-
150
-
151
-
152
-
153
-
154
-
155
-
156
-
157
-
158
-
159
-
160
-
161
-
162
-
163
-
164
-
165
-
166
-
167
-
168
-
169
-
170
-
171
-
172
-
173
 |
 |
