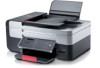
Dell V505 All In One Inkjet Printer User's Guide - Page 124
Scanning Multiple Photos Into a Single File, All Programs, Dell Printers, Dell V505, Start, Programs
 |
View all Dell V505 All In One Inkjet Printer manuals
Add to My Manuals
Save this manual to your list of manuals |
Page 124 highlights
2. Load your original document. For more information, see Loading Original Documents. 3. In Windows Vista: a. Click ® All Programs. b. Click Dell Printers. c. Click Dell V505. In Windows XP and Windows 2000: Click Start® Programs or All Programs® Dell Printers® Dell V505. 4. Select Dell Imaging Toolbox. The Dell Imaging Toolbox opens. NOTE: You can also open the Dell Imaging Toolbox from the operator panel on your printer. When your printer is in Scan mode, press the Start button . The Dell Imaging Toolbox opens. 5. From the Home screen, click Scan. The What are you scanning? dialog box opens. 6. Select the Document option. 7. Click Custom Settings to customize your scan. 8. After customizing your settings, click Start. The printer scans all pages loaded in the ADF. When all pages in the ADF are scanned, a single file containing all scanned pages is created in the selected application. Scanning Multiple Photos Into a Single File NOTE: Some programs do not support multiple-page scanning. 1. Turn on your computer and printer, and ensure that they are connected. 2. Load your original photos on the scanner glass. For more information, see Loading Original Documents on the Scanner Glass. NOTE: For best results, leave the most space possible between the photos and the edges of the scan area. 3. In Windows Vista: a. Click ® Programs. b. Click Dell Printers. c. Click Dell V505. In Windows XP and Windows 2000: Click Start® Programs or All Programs® Dell Printers® Dell V505.
-
 1
1 -
2
-
3
-
4
-
5
-
6
-
7
-
8
-
9
-
10
-
11
-
12
-
13
-
14
-
15
-
16
-
17
-
18
-
19
-
20
-
21
-
22
-
23
-
24
-
25
-
26
-
27
-
28
-
29
-
30
-
31
-
32
-
33
-
34
-
35
-
36
-
37
-
38
-
39
-
40
-
41
-
42
-
43
-
44
-
45
-
46
-
47
-
48
-
49
-
50
-
51
-
52
-
53
-
54
-
55
-
56
-
57
-
58
-
59
-
60
-
61
-
62
-
63
-
64
-
65
-
66
-
67
-
68
-
69
-
70
-
71
-
72
-
73
-
74
-
75
-
76
-
77
-
78
-
79
-
80
-
81
-
82
-
83
-
84
-
85
-
86
-
87
-
88
-
89
-
90
-
91
-
92
-
93
-
94
-
95
-
96
-
97
-
98
-
99
-
100
-
101
-
102
-
103
-
104
-
105
-
106
-
107
-
108
-
109
-
110
-
111
-
112
-
113
-
114
-
115
-
116
-
117
-
118
-
 119
119 -
 120
120 -
 121
121 -
 122
122 -
 123
123 -
 124
124 -
 125
125 -
 126
126 -
 127
127 -
 128
128 -
 129
129 -
130
-
131
-
132
-
133
-
134
-
135
-
136
-
137
-
138
-
139
-
140
-
141
-
142
-
143
-
144
-
145
-
146
-
147
-
148
-
149
-
150
-
151
-
152
-
153
-
154
-
155
-
156
-
157
-
158
-
159
-
160
-
161
-
162
-
163
-
164
-
165
-
166
-
167
-
168
-
169
-
170
-
171
-
172
-
173
 |
 |
