Epson ET-2750 Users Guide - Page 112
Preview, Advanced Settings, Image Format, Options, File Name, Settings, Folder, Select
 |
View all Epson ET-2750 manuals
Add to My Manuals
Save this manual to your list of manuals |
Page 112 highlights
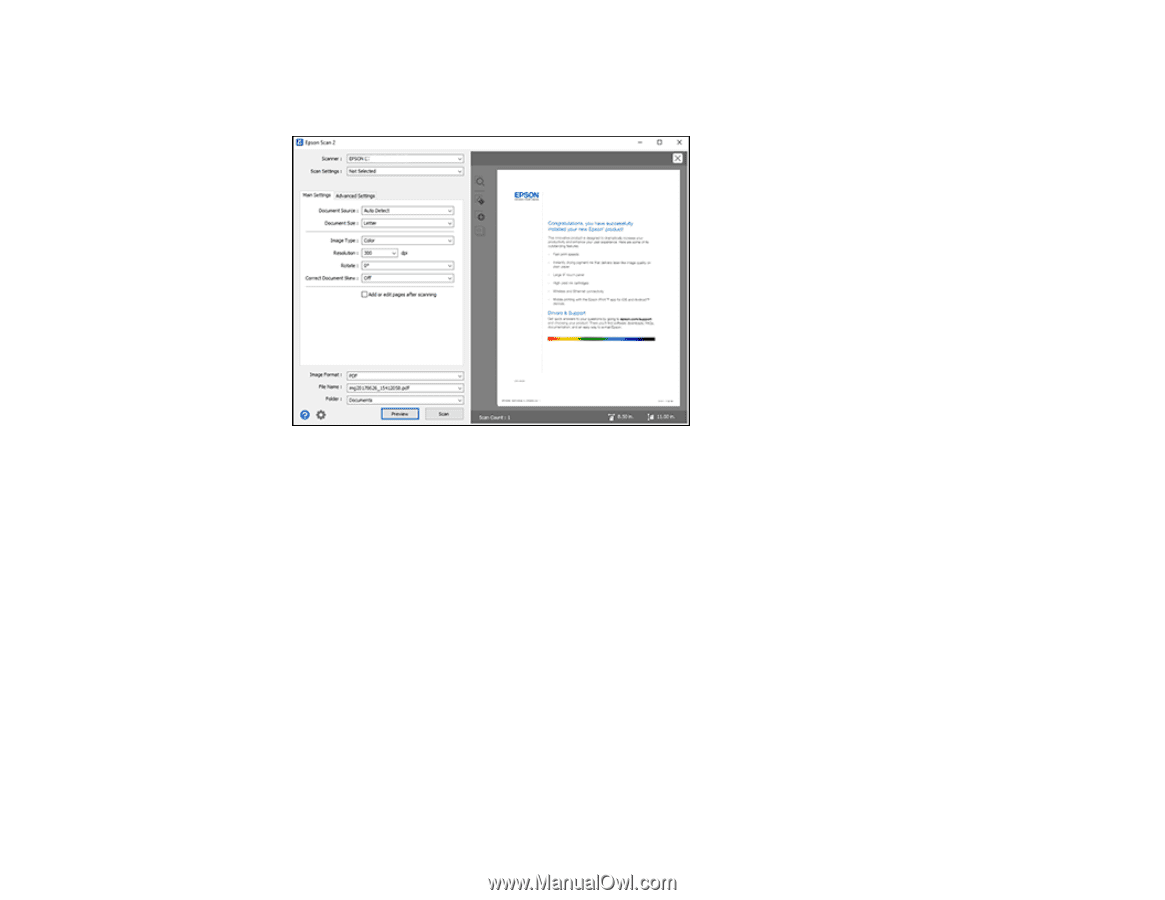
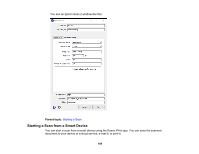
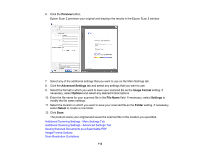
6. Click the Preview button. Epson Scan 2 previews your original and displays the results in the Epson Scan 2 window. 7. Select any of the additional settings that you want to use on the Main Settings tab. 8. Click the Advanced Settings tab and select any settings that you want to use. 9. Select the format in which you want to save your scanned file as the Image Format setting. If necessary, select Options and select any desired format options. 10. Enter the file name for your scanned file in the File Name field. If necessary, select Settings to modify the file name settings. 11. Select the location in which you want to save your scanned file as the Folder setting. If necessary, select Select to create a new folder. 12. Click Scan. The product scans your original and saves the scanned file in the location you specified. Additional Scanning Settings - Main Settings Tab Additional Scanning Settings - Advanced Settings Tab Saving Scanned Documents as a Searchable PDF Image Format Options Scan Resolution Guidelines 112
-
 1
1 -
2
-
3
-
4
-
5
-
6
-
7
-
8
-
9
-
10
-
11
-
12
-
13
-
14
-
15
-
16
-
17
-
18
-
19
-
20
-
21
-
22
-
23
-
24
-
25
-
26
-
27
-
28
-
29
-
30
-
31
-
32
-
33
-
34
-
35
-
36
-
37
-
38
-
39
-
40
-
41
-
42
-
43
-
44
-
45
-
46
-
47
-
48
-
49
-
50
-
51
-
52
-
53
-
54
-
55
-
56
-
57
-
58
-
59
-
60
-
61
-
62
-
63
-
64
-
65
-
66
-
67
-
68
-
69
-
70
-
71
-
72
-
73
-
74
-
75
-
76
-
77
-
78
-
79
-
80
-
81
-
82
-
83
-
84
-
85
-
86
-
87
-
88
-
89
-
90
-
91
-
92
-
93
-
94
-
95
-
96
-
97
-
98
-
99
-
100
-
101
-
102
-
103
-
104
-
105
-
106
-
 107
107 -
 108
108 -
 109
109 -
 110
110 -
 111
111 -
 112
112 -
 113
113 -
 114
114 -
 115
115 -
 116
116 -
 117
117 -
118
-
119
-
120
-
121
-
122
-
123
-
124
-
125
-
126
-
127
-
128
-
129
-
130
-
131
-
132
-
133
-
134
-
135
-
136
-
137
-
138
-
139
-
140
-
141
-
142
-
143
-
144
-
145
-
146
-
147
-
148
-
149
-
150
-
151
-
152
-
153
-
154
-
155
-
156
-
157
-
158
-
159
-
160
-
161
-
162
-
163
-
164
-
165
-
166
-
167
-
168
-
169
-
170
-
171
-
172
-
173
-
174
-
175
-
176
-
177
-
178
-
179
-
180
-
181
-
182
-
183
-
184
-
185
-
186
-
187
-
188
-
189
-
190
-
191
-
192
-
193
-
194
-
195
-
196
-
197
-
198
-
199
-
200
-
201
-
202
-
203
-
204
-
205
-
206
-
207
-
208
-
209
-
210
-
211
-
212
-
213
-
214
-
215
-
216
-
217
-
218
-
219
-
220
-
221
-
222
-
223
-
224
-
225
-
226
 |
 |