Epson MX-85 User Manual
Epson MX-85 Manual
 |
View all Epson MX-85 manuals
Add to My Manuals
Save this manual to your list of manuals |
Epson MX-85 manual content summary:
- Epson MX-85 | User Manual - Page 1
MX-85 DOT MATRIX PRINTER Operation Manual P8290062-1 - Epson MX-85 | User Manual - Page 2
Copyright © 1982 by EPSON Shinshu Seiki Co., Ltd. Nagano, Japan "All rights reserved" *The contents of this manual are subject to change without notice. - Epson MX-85 | User Manual - Page 3
1.5. Assembly ...4 1.6. Opening the printer 4 1.7. Removal of shipping screws 5 1.8. Removal of the upper case 5 2. Construction and Location of the MX-85 Component 7 3. Setting of DIP swtiches and jumpers 9 3.1. Location of DIP switches and Jumpers 9 3.2. Setting DIP switches - SW-A and SW - Epson MX-85 | User Manual - Page 4
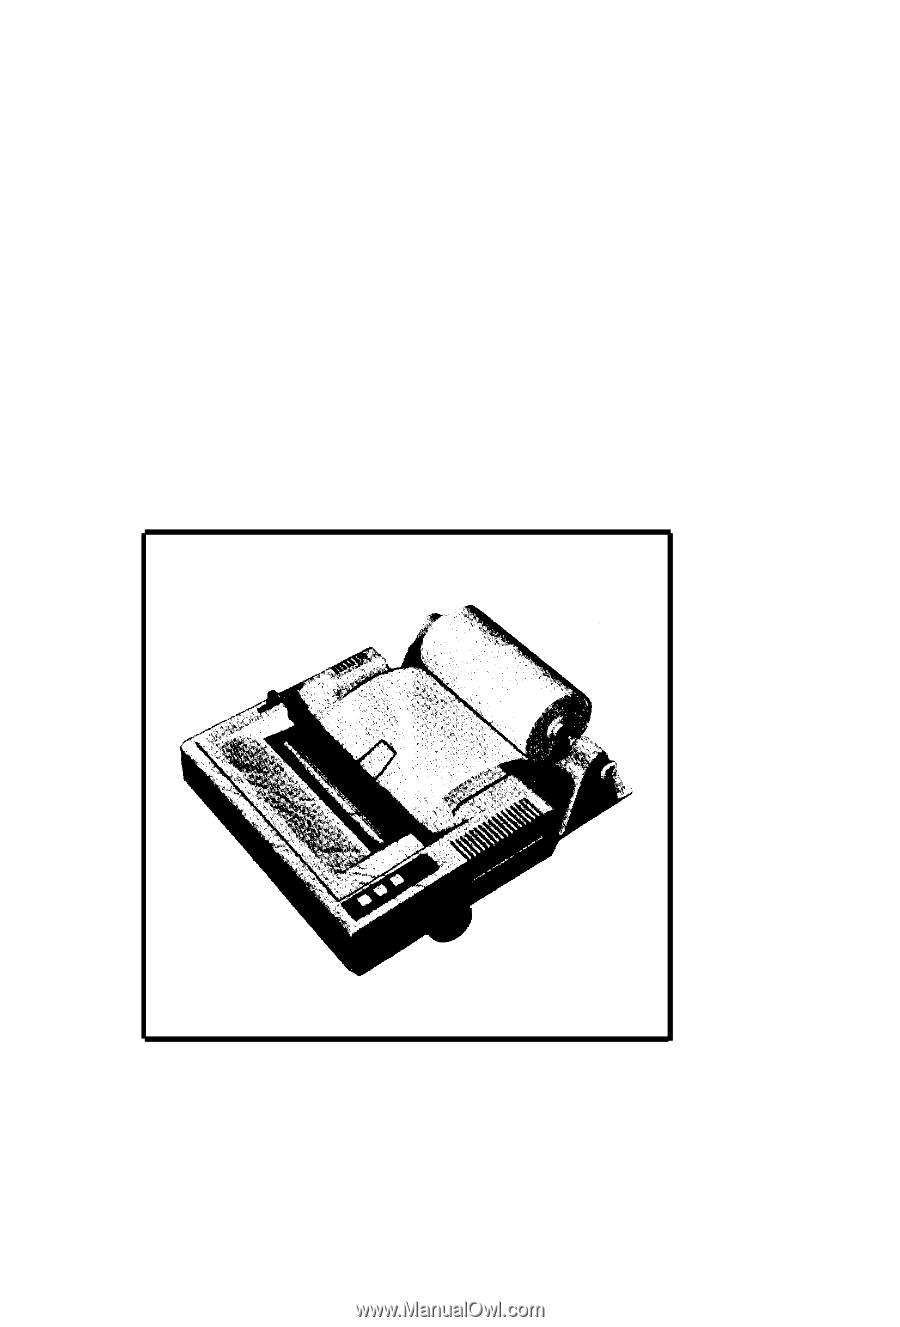
LIST OF FIGURES Fig. 1 MX-85 Dot Matrix Printer 1 Fig. 2 Contents of Carton 3 Fig. 3 Removal of Printer Cover 4 Fig. 4 Removal of Shipping Screws 5 Fig. 5 Removing Manual Paper Feed Knob 6 Fig. 6 Loosening All 4 Screws 6 Fig. 7 Removing Wires Connected to Control Panel 7 Fig. 8 Construction - Epson MX-85 | User Manual - Page 5
LIST OF TABLES Table 1 Table 2 Table 3 Table 4 Table 5 Table 6 Table 7 Function and Conditions of DIP Switch B 10 Function and Conditions of DIP Switch A 10 Baud Rate Selection 11 ASCII Code Table Selection 11 BAUDOT Code Table Selection 11 Function and Conditions of Jumpers 12 25-pin EIA - Epson MX-85 | User Manual - Page 6
INTRODUCTION The MX-85 Dot Matrix Printer is a highly versatile communication grade terminal printer, with the size: 4K Bytes 6. High quality and reliability 7. High density print quality - 9x7 Matrix 8. Operator replaceable, low cost dot head with 100x106 character life 9. Operator replaceable - Epson MX-85 | User Manual - Page 7
evidence of shipping damage. If such evidence is present, notify the carrier immediately. 1.1. Unpacking (1) Open carton. (2) Remove accessories; ribbon, manual, etc. (3) Grasp the MX-85 by, its underside and lift straight out with 'packing material attached. (4) Place the printer on a flat surface - Epson MX-85 | User Manual - Page 8
any evidence of damage or missing items, contact the vendor from whom the printer was purchased to report the details. 6. Filter Circuit Board (Y4252O400000) 3. Operation Manual 4. Roll Paper Holder 1. MX-85 Dot Matrix Pritner 5. AC Power Cord Fig. 2 Contents of Carton -3- - Epson MX-85 | User Manual - Page 9
sudden changes in temperature and extreme shock. 1.5. Assembly The following items will be necessary to complete the set-up of the MX-85 Printer. 1. Phillips #2 screwdriver 2. Flat blade screwdriver 3. Soldering iron (if jumper revision is necessary) 1.6. Opening the printer With the Printer facing - Epson MX-85 | User Manual - Page 10
not bent. 2. Remove the two (2) shipping screws from the lower case. NOTE: These shipping screws should be retained for use during reshipment of the MX-85. They are necessary to prevent damage to the print mechanism which may be caused by shock or vibration during transportation. Right Side of the - Epson MX-85 | User Manual - Page 11
Pull out Fig. 5 Removing Manual Paper Feed Knob 3. Turn the Printer upside down, observing caution with the paper roll release 4. Loosen the four (4) Phillips head screws located in the extreme - Epson MX-85 | User Manual - Page 12
Upper Case Lead Wire Fig. 7 Removing Wires Connected to Control Panel 2. Construction and Location of the MX-85 Components At this time, the following main components of the MX-85 Printer and their respective locations can be observed: 1. Transformer & Filter Circuit Board 2. SMDP Board - Top 3. - Epson MX-85 | User Manual - Page 13
Printer Controller Printer Machanism Transformer & Filter Circuit Board Control Panel Transformer & Filter Circuit Board Controller Printer Mechanism Spacer MX-85 Dot Matrix Printer SMDP Board (Driver Circuit Board) Connector (male and female) SMCT Board (Control Circuit Board) Controller Fig - Epson MX-85 | User Manual - Page 14
3. Setting of DIP Switches and Jumpers 3.1. Location of DIP switches and jumpers In order to suit each user's specific requirements, there are two (2) DIP (Dual In-Line Pin) switches located on the SMDP Board and sixteen (16) jumpers located on the SMCT Board. 3.2. Setting DIP switches - SW-A and SW - Epson MX-85 | User Manual - Page 15
Fig. 10 Setting DIP Swtiches Table 1 Functions and Conditions of DIP Switch B Pin No. Function Off On Factory-set B1 ON B2 Baud Rate B3 See Table 3 OFF ON B4 OFF Table 2 Functions and Conditions of DIP Switch A Pin No. A1 A2 A3 A4 A5 A6 A7 A8 Function Transmission Code In ASCII - Epson MX-85 | User Manual - Page 16
4. Now using Table 2, select your transmission code: ASCII or Baudot. A. If ASCII is selected, refer to Table 4 for word length setting and parity control. B. If Baudot is selected, refer to Table 5 for selection of correct Baudot code. 5. Set Line Spacing to desired position. 6. Set Auto Feed if - Epson MX-85 | User Manual - Page 17
3.3. Setting of jumpers Your application may require the removal or installation of jumpers of the SMCT Board. Before continuing, consult Table 6 which outlines the function and factory-set condition of each jumper. In order to access the SMCT Board it is necessary to remove the SMDP Board. This is - Epson MX-85 | User Manual - Page 18
Fig. 11 Jumpers on the SMCT Board Jumper OFF Jumper ON -13- - Epson MX-85 | User Manual - Page 19
to loosen the existing connection and reconnect to the desired voltage. This change will necessitate a change in the filter circuit board, so your MX-85 supplier should be notified. NOTE: Any changes in this area should be performed by an experienced technician. Terminal Block Lead Wire / Fig. 12 - Epson MX-85 | User Manual - Page 20
print scale is pushed to the rear, against the platen. 4. Remove the ribbon from its box and turn the knob counterclockwise to remove any slack. 5. Guide the four (4) tabs on the cartridge into the mechanism side frames. 6. Press down on both ends of the cartridge to firmly seat it. 7. Using - Epson MX-85 | User Manual - Page 21
of Correct and Incorrect Ribbon Setting 6. Paper Holder Installation The following steps should be performed with the power off. 1. Set the paper holder behind the MX-85 and locate the rear rubber feet of the Printer in the forward holes of the paper holder. Failure to do this will result in severe - Epson MX-85 | User Manual - Page 22
into the mating connector located alongside of the 25-pin EIA connector on the rear of the MX-85. 3. Lift the printer cover and slide the print head to approximately the center of the printer . 10. Close the printer cover. MX-85 Dot Matrix Printer 'Paper Holder Put into the two holes Rear View of - Epson MX-85 | User Manual - Page 23
Roll Paper Fig. 17 Loading of Rool Paper (2) Manual Paper Feed Knob Fig. 18 Loading of Roll Paper (3) 7. Gap Adjustment It is possible to adjust the gap between the print head and platen to - Epson MX-85 | User Manual - Page 24
Head Adjusting Lever (Side View) Paper Single-leaf paper Multi-copy paper sheets Position of adjusting lever Set the lever to the 4th step. Set the lever to the 7th step. Fig. 19 Gap Adjustment -19- - Epson MX-85 | User Manual - Page 25
OPERATION Power On 1. Plug in AC power cord. 2. Turn on the Printer - switch located to the rear on the right side of the Printer. 1) Buzzer will sound. 2) Print head will return to the left side of the Printer. 3) The "Power", "Ready" and "On-Line" indicators should be lit on the control panel. " - Epson MX-85 | User Manual - Page 26
. 3. Turn on power while holding the LF button depressed. 4. The MX-85 will begin printing its test pattern. The LF button can be released after printing commences. NOTE: See Appendix C for Character Fonts. If any problems are encountered at this point, contact your vendor for correction before - Epson MX-85 | User Manual - Page 27
Signal Ground Reverse Channel (REV) Data Term Rdy (DTR) TTY-RXD Return TTY-RXD Current Loop Input 4. Theory of Operation The data received by the MX-85 is stored in the 4K Byte Memory. Printing is initiated by the following means: 1. Receipt of the Carriage Return (CR) or Line Feed (LF) Control - Epson MX-85 | User Manual - Page 28
if there are any printable characters stored in the memory. The "Paper-Out" indicator w&be extinguished and the "Ready" indicator illuminated if the MX-85 is not in a memory full condition. 4.3. 4K memory full When the buffer memory reaches 3,996 bytes, the following conditions will take place - Epson MX-85 | User Manual - Page 29
5. Paper Tear-Off 1. To tear off the last message printed, depress the FF button to position the paper. 2. Hold down the printer cover while tearing the paper. 3. Check to see that the paper is against the platen and that the paper has not shifted. Reposition if necessary. Tear off the Paper Fig. 21 - Epson MX-85 | User Manual - Page 30
MAINTENANCE AND PARTS REPLACEMENT Preventative Maintenance of the MX-85 consists mainly of cleaning. 1. Paper dust and print head. Cartridge ribbon replacement is covered in a previous section of this manual. Print Head replacement CAUTION: The print head runs very hot under normal operating - Epson MX-85 | User Manual - Page 31
Print Head Unit Head Lock Lever Carriage A&embly (Side View) Terminal Board Head Connector Be sure to hold this connectar firmly to pull the head cable out straight. *Take hold of the cable at the point indicated by arrows and apply force in either of the directions indicated by arrow to - Epson MX-85 | User Manual - Page 32
Appendix A ASCII Code Table b1 (low order bit) is normally transmitted first. -27- - Epson MX-85 | User Manual - Page 33
Appendix B Baudot Code Table -28- - Epson MX-85 | User Manual - Page 34
Appendix C Character Fonts (Hex. Code) AF NOTE: Numbers represent Hex. -29- - Epson MX-85 | User Manual - Page 35
NOTE: Numbers represent Hex. Code. -30- - Epson MX-85 | User Manual - Page 36
and used properly, that is, in strict accordance with the manufacturer's instructions, may cause interference to radio and tele vision reception. It has Commission helpful: "How to Identify and Resolve Radio-TV Interference Problems. " This booklet is available from the US Government Printing Office
-
 1
1 -
 2
2 -
 3
3 -
 4
4 -
 5
5 -
 6
6 -
 7
7 -
8
-
9
-
10
-
11
-
12
-
13
-
14
-
15
-
16
-
17
-
18
-
19
-
20
-
21
-
22
-
23
-
24
-
25
-
26
-
27
-
28
-
29
-
30
-
31
-
32
-
33
-
34
-
35
-
36
 |
 |
MX-85
DOT MATRIX PRINTER
Operation Manual
P8290062-1