Epson MX-85 User Manual - Page 30
MAINTENANCE AND PARTS REPLACEMENT, Print Head replacement
 |
View all Epson MX-85 manuals
Add to My Manuals
Save this manual to your list of manuals |
Page 30 highlights
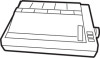
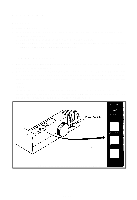
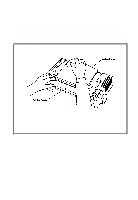
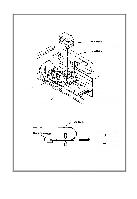
MAINTENANCE AND PARTS REPLACEMENT Preventative Maintenance of the MX-85 consists mainly of cleaning. 1. Paper dust and particles should be cleared away with a soft brush. 2. The exterior of the Printer can be cleaned with a mild detergent and water solution. 3. The interior of the Printer can be cleaned with denatured alcohol. The only user replaceable items are the cartridge ribbon and the print head. Cartridge ribbon replacement is covered in a previous section of this manual. Print Head replacement CAUTION: The print head runs very hot under normal operating conditions. Allow time for it to cool before attempting replacement. 1. Remove the printer cover and cartridge ribbon. 2. Turn the head locking lever clockwise and lift the print head straight up. 3. Disconnect the cable carefully by pulling the plastic tab under the cable while holding the terminal board. 4. Install the new print head onto the carriage assembly and turn the head locking lever counterclockwise. 5. Carefully install the head cable into the connector assembly. 6. Replace the cartridge ribbon and printer cover. 7. Run Self-Test. -25-
-
 1
1 -
2
-
3
-
4
-
5
-
6
-
7
-
8
-
9
-
10
-
11
-
12
-
13
-
14
-
15
-
16
-
17
-
18
-
19
-
20
-
21
-
22
-
23
-
24
-
 25
25 -
 26
26 -
 27
27 -
 28
28 -
 29
29 -
 30
30 -
 31
31 -
 32
32 -
 33
33 -
 34
34 -
 35
35 -
36
 |
 |