Epson MX-85 User Manual - Page 20
Cartridge Ribbon Installation
 |
View all Epson MX-85 manuals
Add to My Manuals
Save this manual to your list of manuals |
Page 20 highlights
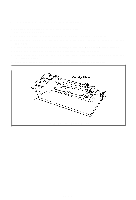
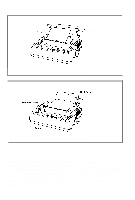
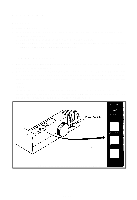
5. Cartridge Ribbon Installation 1. Position the Printer with the logo facing you. 2. Lift the Printer cover. 3. Be sure the print scale is pushed to the rear, against the platen. 4. Remove the ribbon from its box and turn the knob counterclockwise to remove any slack. 5. Guide the four (4) tabs on the cartridge into the mechanism side frames. 6. Press down on both ends of the cartridge to firmly seat it. 7. Using a pencil or a similar item, place the ribbon between the front of the head and the ribbon guide. 8. Wind the ribbon counterclockwise and verify correct positioning. Fig. 13 Cartridge Ribbon Setting -15-
-
 1
1 -
2
-
3
-
4
-
5
-
6
-
7
-
8
-
9
-
10
-
11
-
12
-
13
-
14
-
 15
15 -
 16
16 -
 17
17 -
 18
18 -
 19
19 -
 20
20 -
 21
21 -
 22
22 -
 23
23 -
 24
24 -
 25
25 -
26
-
27
-
28
-
29
-
30
-
31
-
32
-
33
-
34
-
35
-
36
 |
 |
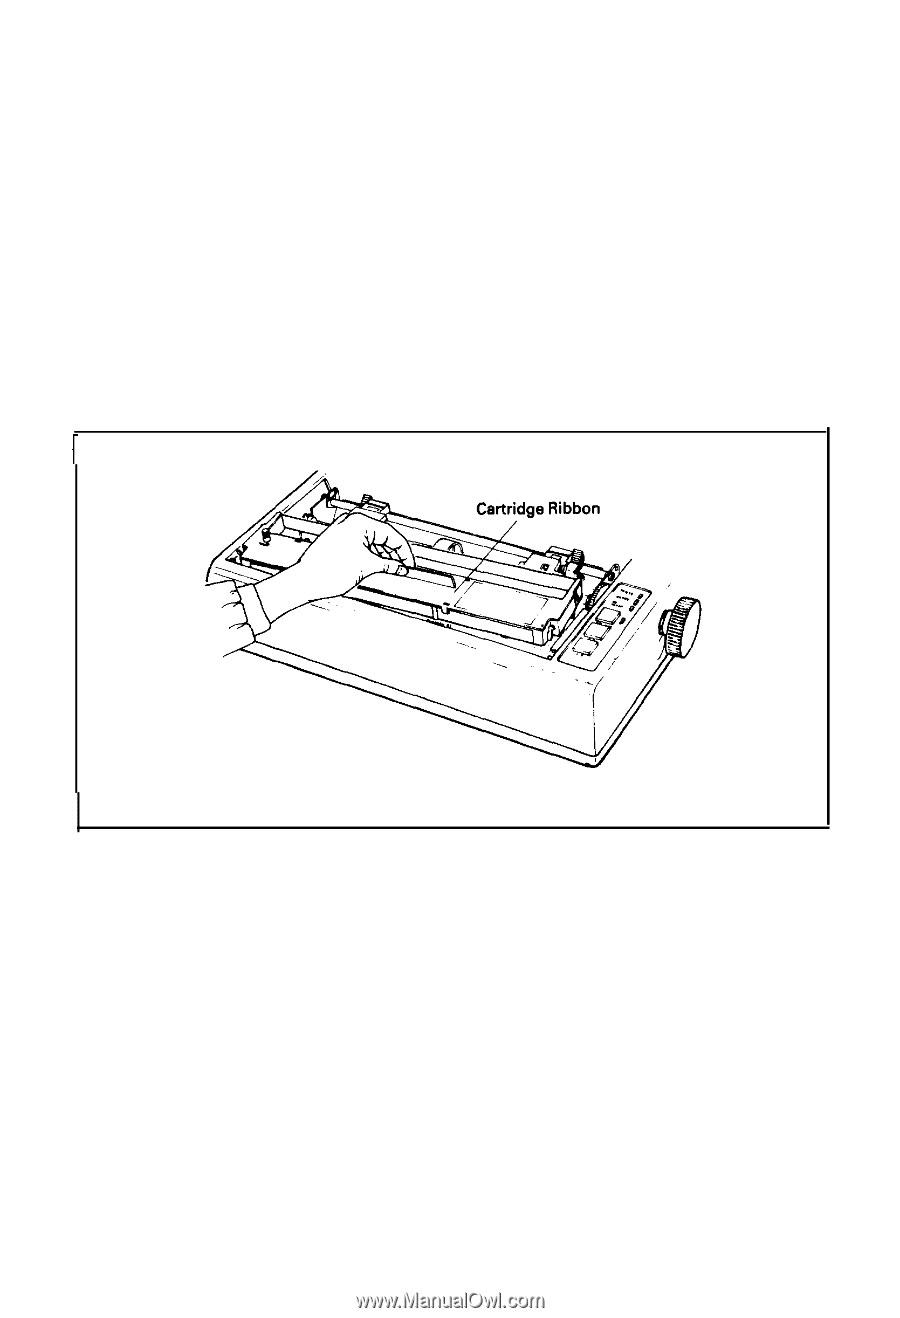
5. Cartridge Ribbon Installation
1. Position the Printer with the logo facing you.
2. Lift the Printer cover.
3. Be sure the print scale is pushed to the rear, against the platen.
4. Remove the ribbon from its box and turn the knob counterclockwise to remove
any slack.
5. Guide the four (4) tabs on the cartridge into the mechanism side frames.
6. Press down on both ends of the cartridge to firmly seat it.
7.
Using a pencil or a similar item, place the ribbon between the front of the head and
the ribbon guide.
8. Wind the ribbon counterclockwise and verify correct positioning.
Fig. 13
Cartridge Ribbon Setting
-15-