Epson PowerLite Home 20 User Manual - Page 37
The picture is blurry., The picture looks too light or too dark.
 |
View all Epson PowerLite Home 20 manuals
Add to My Manuals
Save this manual to your list of manuals |
Page 37 highlights
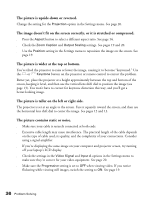
The picture is blurry. ■ There may be dirt on the lens. Clean the lens as described on page 25. ■ Make sure the lens is not fogged by condensation. If you've just moved the projector from a cold environment, wait a couple of minutes before using it. ■ Adjust the focus using the focus ring. See page 13. ■ Make sure the projector is placed the correct distance from the screen: no closer than 2.4 feet (73 cm) and no farther than 45.7 feet (13.9 m). ■ Adjust the Sharpness setting in the Image menu. See page 18. ■ If you're using the Keystone adjustment, be aware that it lessens image quality. You may wish to decrease the projection angle to reduce the amount of keystone correction needed, or use the lens shift dials to position the image. See page 13. ■ If you're projecting from a computer, press the Auto button on the remote control. If you see no improvement, you may need to adjust the Tracking and Sync. See page 18. The picture looks too light or too dark. ■ Make sure the Setup Level is set correctly (see page 20). If it's not, dark or black parts of the picture may look washed-out. ■ Press the Color Mode button on the remote control to select the best setting for your viewing environment. ■ Adjust the Brightness and Contrast settings in the Image menu. See page 18. Note: These settings should be adjusted separately for each video source you're using. ■ If the picture looks darker than it used to, you may need to replace the lamp. See page 27. The colors on the screen don't look right. ■ Press the Color Mode button on the remote control to select the best setting for your viewing environment. ■ Adjust the following settings in the Image menu: Color Saturation, Tint, Color Temp., and Skin Tone. See page 18. Note: These settings should be adjusted separately for each video source you're using. ■ Check the settings in the Video Signal and Input A options in the Settings menu to make sure they're correct for your video equipment. See page 20. ■ If your video equipment is connected with component video cables, make sure all three connectors are securely attached at both ends. Problem Solving 37
-
 1
1 -
2
-
3
-
4
-
5
-
6
-
7
-
8
-
9
-
10
-
11
-
12
-
13
-
14
-
15
-
16
-
17
-
18
-
19
-
20
-
21
-
22
-
23
-
24
-
25
-
26
-
27
-
28
-
29
-
30
-
31
-
 32
32 -
 33
33 -
 34
34 -
 35
35 -
 36
36 -
 37
37 -
 38
38 -
 39
39 -
 40
40 -
 41
41 -
 42
42 -
43
-
44
-
45
-
46
-
47
-
48
-
49
-
50
 |
 |
