Epson PowerLite Home Cinema 3010e User's Guide - Page 32
Choosing the Color Mode
 |
View all Epson PowerLite Home Cinema 3010e manuals
Add to My Manuals
Save this manual to your list of manuals |
Page 32 highlights
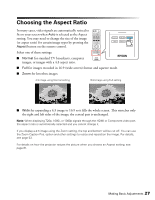
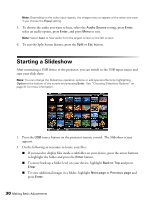
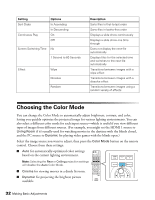
Setting Sort Order Continuous Play Options In Ascending In Descending On Off Screen Switching Time No 1 Second to 60 Seconds Effect Wipe Dissolve Random Description Sorts files in first-to-last order Sorts files in last-to-first order Displays a slide show continuously Displays a slide show one time through Does not display the next file automatically Displays files for the selected time and switches to the next file automatically Transitions between images with a wipe effect Transitions between images with a dissolve effect Transitions between images using a random variety of effects Choosing the Color Mode You can change the Color Mode to automatically adjust brightness, contrast, and color, letting you quickly optimize the projected image for various lighting environments. You can also select a different color mode for each input source-which is useful if you view different types of images from different sources. (For example, you might set the HDMI 1 source to Living Room if it's usually used for watching movies in the daytime with the blinds closed, and the PC source to Dynamic for playing video games with the blinds open.) Select the image source you want to adjust, then press the Color Mode button on the remote control. Choose from these settings: ■ Auto for automatically-optimized color settings based on the current lighting environment. Note: Selecting the Rear or Ceiling projection settings will disable the Auto Color Mode. ■ Cinema for viewing movies in a dimly lit room. ■ Dynamic for projecting the brightest picture available. 32 Making Basic Adjustments
-
 1
1 -
2
-
3
-
4
-
5
-
6
-
7
-
8
-
9
-
10
-
11
-
12
-
13
-
14
-
15
-
16
-
17
-
18
-
19
-
20
-
21
-
22
-
23
-
24
-
25
-
26
-
 27
27 -
 28
28 -
 29
29 -
 30
30 -
 31
31 -
 32
32 -
 33
33 -
 34
34 -
 35
35 -
 36
36 -
 37
37 -
38
-
39
-
40
-
41
-
42
-
43
-
44
-
45
-
46
-
47
-
48
-
49
-
50
-
51
-
52
-
53
-
54
-
55
-
56
-
57
-
58
-
59
-
60
-
61
-
62
-
63
-
64
-
65
-
66
-
67
-
68
-
69
-
70
-
71
-
72
-
73
-
74
-
75
-
76
-
77
-
78
-
79
-
80
-
81
-
82
-
83
-
84
-
85
-
86
-
87
-
88
 |
 |
