Epson Stylus COLOR 850Ne User Setup Information - Page 30
Configuring for TCP/IP, Using EPSON Net!2
 |
View all Epson Stylus COLOR 850Ne manuals
Add to My Manuals
Save this manual to your list of manuals |
Page 30 highlights
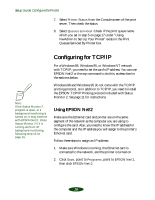
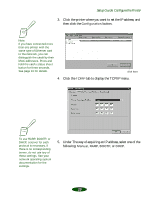
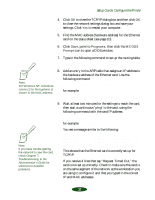
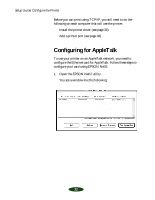
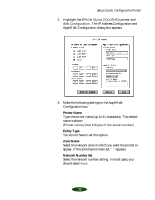
Setup Guide: Configure the Printer 7. Select Printer Status from the Console screen of the print server. Then check the status. 8. Select Queues serviced. Check if the print queue name which you set in step 5 on page 17 under "Using NwAdmin to Set Up Your Printer" exists in the Print Queues Serviced By Printer box. Note: If the Status Monitor 2 program is open, or if background monitoring is turned on, it may interfere with EPSON Net!2. Close Status Monitor 2 if it is running and turn off background monitoring, following step 13 on page 15. Configuring for TCP/IP For a Windows 98, Windows 95, or Windows NT network with TCP/IP, you need to set the card's IP address. You can use EPSON Net!2 or the arp command to do this, as described in the sections below. Windows 98 and Windows 95 do not come with the TCP/IP printing protocol, so in addition to TCP/IP, you need to install the EPSON TCP/IP Printing protocol included with Status Monitor 2. See page 11 for instructions. Using EPSON Net!2 Make sure the Ethernet card and printer are on the same segment of the network as the computer you are using to configure the card. Also, you need to know the IP address for the computer and the IP address you will assign to the printer's Ethernet card. Follow these steps to assign an IP address: 1. Make sure Windows is running, the Ethernet card is connected to the network, and the printer is turned on. 2. Click Start, point to Programs, point to EPSON Net!2, then click EPSON Net!2. 28
-
 1
1 -
2
-
3
-
4
-
5
-
6
-
7
-
8
-
9
-
10
-
11
-
12
-
13
-
14
-
15
-
16
-
17
-
18
-
19
-
20
-
21
-
22
-
23
-
24
-
 25
25 -
 26
26 -
 27
27 -
 28
28 -
 29
29 -
 30
30 -
 31
31 -
 32
32 -
 33
33 -
 34
34 -
 35
35 -
36
-
37
-
38
-
39
-
40
-
41
-
42
 |
 |
