Epson Stylus COLOR 850Ne User Setup Information - Page 32
Using the arp Command, In Windows NT, click
 |
View all Epson Stylus COLOR 850Ne manuals
Add to My Manuals
Save this manual to your list of manuals |
Page 32 highlights
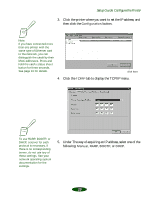
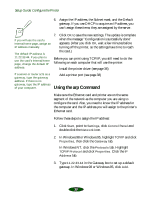
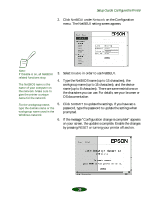
Setup Guide: Configure the Printer 6. Assign the IP address, the Subnet mask, and the Default gateway. If you use DHCP to acquire an IP address, you can't assign these items; they are assigned by the server. If you will use the card's internal home page, assign an IP address manually. The default IP address is 11.22.33.44. If you plan to use the card's internal home page, change the default IP address. 7. Click OK to save the new settings. The update is complete when the message "Configuration is successfully done" appears. (After you click OK, wait a few minutes before turning off the printer, so the settings have time to reach the card.) Before you can print using TCP/IP, you still need to do the following on each computer that will use the printer: Install the printer driver (see page 36) If a server or router acts as a gateway, type the gateway address. If there is no gateway, type the IP address of your computer. Add a printer port (see page 38) Using the arp Command Make sure the Ethernet card and printer are on the same segment of the network as the computer you are using to configure the card. Also, you need to know the IP address for the computer and the IP address you will assign to the printer's Ethernet card. Follow these steps to assign the IP address: 1. Click Start, point to Settings, click Control Panel and double-click the Network icon. 2. In Windows 98 or Windows 95, highlight TCP/IP and click Properties, then click the Gateway tab. In Windows NT, click the Protocols tab. Highlight TCP/IP Protocol and click Properties. Click the IP Address tab. 3. Type 11.22.33.44 in the Gateway box to set up a default gateway. In Windows 98 or Windows 95, click Add. 30
-
 1
1 -
2
-
3
-
4
-
5
-
6
-
7
-
8
-
9
-
10
-
11
-
12
-
13
-
14
-
15
-
16
-
17
-
18
-
19
-
20
-
21
-
22
-
23
-
24
-
25
-
26
-
 27
27 -
 28
28 -
 29
29 -
 30
30 -
 31
31 -
 32
32 -
 33
33 -
 34
34 -
 35
35 -
 36
36 -
 37
37 -
38
-
39
-
40
-
41
-
42
 |
 |
