Epson Stylus COLOR 900N User Manual - Page 88
Removing and Installing Ink Cartridges, to remove the clear seal underneath
 |
View all Epson Stylus COLOR 900N manuals
Add to My Manuals
Save this manual to your list of manuals |
Page 88 highlights
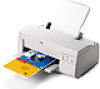
When you need new ink cartridges, contact your dealer or call EPSON Accessories at (800) 873-7766 or visit our web site at www.epsonsupplies.com (U.S. sales only). In Canada, please call (800) 873-7766 for dealer referral. If you need to replace an ink cartridge before the lights flash (because the ink is too old, for example) follow the instructions in "Replacing an Outdated Ink Cartridge" on page 83. Removing and Installing Ink Cartridges You can replace a cartridge when the B black or A color ink out light is either flashing or on. (If you perform these steps when both ink out lights are off, the printer cleans the print heads as described on page 77.) Follow these steps to replace ink cartridges: 1. Remove the new ink cartridge from its packaging. 2. Remove only the yellow part of the tape seal on top as shown to the right. Don't pull off the blue portion or try to remove the clear seal underneath the cartridge. Remove the yellow tape black cartridge color cartridge You must remove the yellow tape from the top of the cartridge or you will permanently damage it. Do not remove the clear seal from the bottom of the cartridge; ink will leak. 3. Make sure the printer is turned on and not printing, then open the printer cover. 4. Press the R cleaning button and hold it for about three seconds until the print head moves left and the P power light begins flashing. The print head moves to the black or color cartridge replacement position, depending on which ink cartridge is empty. 81
-
 1
1 -
2
-
3
-
4
-
5
-
6
-
7
-
8
-
9
-
10
-
11
-
12
-
13
-
14
-
15
-
16
-
17
-
18
-
19
-
20
-
21
-
22
-
23
-
24
-
25
-
26
-
27
-
28
-
29
-
30
-
31
-
32
-
33
-
34
-
35
-
36
-
37
-
38
-
39
-
40
-
41
-
42
-
43
-
44
-
45
-
46
-
47
-
48
-
49
-
50
-
51
-
52
-
53
-
54
-
55
-
56
-
57
-
58
-
59
-
60
-
61
-
62
-
63
-
64
-
65
-
66
-
67
-
68
-
69
-
70
-
71
-
72
-
73
-
74
-
75
-
76
-
77
-
78
-
79
-
80
-
81
-
82
-
 83
83 -
 84
84 -
 85
85 -
 86
86 -
 87
87 -
 88
88 -
 89
89 -
 90
90 -
 91
91 -
 92
92 -
 93
93 -
94
-
95
-
96
-
97
-
98
-
99
-
100
-
101
-
102
-
103
-
104
-
105
-
106
-
107
-
108
-
109
-
110
-
111
-
112
-
113
-
114
-
115
-
116
-
117
-
118
-
119
-
120
-
121
-
122
-
123
-
124
-
125
 |
 |
