Epson Stylus COLOR 900N User Manual - Epson Stylus RIP Mac & PC - Page 44
Installing EPSON Stylus RIP for Windows, Insert the EPSON Stylus RIP CD-ROM in your drive.
 |
View all Epson Stylus COLOR 900N manuals
Add to My Manuals
Save this manual to your list of manuals |
Page 44 highlights
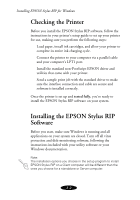
Installing EPSON Stylus RIP for Windows Follow these steps to install the RIP and driver on your computer: 1. Insert the EPSON Stylus RIP CD-ROM in your drive. The install program starts automatically. If it doesn’t start automatically, double-click My Computer. Then double-click the Stylus RIP icon. 2. Choose your printer model from the Installer dialog box and click Install. If you are installing the RIP on a Client computer, click Exit and skip ahead to installing the PostScript driver on page 3-4. 3. At the introductory screen, click Next. Then choose an installation directory for the EPSON Stylus RIP by clicking Browse, or click Next to accept the default installation location. 3-3
-
 1
1 -
2
-
3
-
4
-
5
-
6
-
7
-
8
-
9
-
10
-
11
-
12
-
13
-
14
-
15
-
16
-
17
-
18
-
19
-
20
-
21
-
22
-
23
-
24
-
25
-
26
-
27
-
28
-
29
-
30
-
31
-
32
-
33
-
34
-
35
-
36
-
37
-
38
-
 39
39 -
 40
40 -
 41
41 -
 42
42 -
 43
43 -
 44
44 -
 45
45 -
 46
46 -
 47
47 -
 48
48 -
 49
49 -
50
-
51
-
52
-
53
-
54
-
55
-
56
-
57
-
58
-
59
-
60
-
61
-
62
-
63
-
64
-
65
-
66
-
67
-
68
-
69
-
70
-
71
-
72
-
73
-
74
-
75
-
76
-
77
-
78
-
79
 |
 |

3-3
Installing EPSON Stylus RIP for Windows
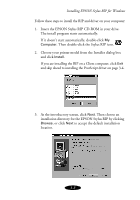
Follow these steps to install the RIP and driver on your computer:
1.
Insert the EPSON Stylus RIP CD-ROM in your drive.
The install program starts automatically.
If it doesn±t start automatically, double-click
My
Computer
. Then double-click the Stylus RIP icon.
2.
Choose your printer model from the Installer dialog box
and click
Install
.
If you are installing the RIP on a Client computer, click
Exit
and skip ahead to installing the PostScript driver on page 3-4.
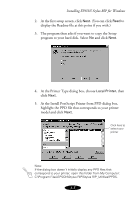
3.
At the introductory screen, click
Next
. Then choose an
installation directory for the EPSON Stylus RIP by clicking
Browse
, or click
Next
to accept the default installation
location.