Epson Stylus COLOR 900N User Manual - Epson Stylus RIP Mac & PC - Page 64
Sending Print Jobs from Client Computers, Choose
 |
View all Epson Stylus COLOR 900N manuals
Add to My Manuals
Save this manual to your list of manuals |
Page 64 highlights
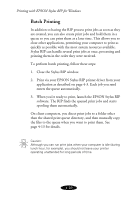
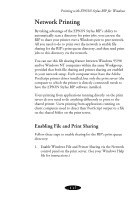
Printing with EPSON Stylus RIP for Windows 4. Select a Drive Letter (such as R) and check the Reconnect at Login checkbox. Click OK. Sending Print Jobs from Client Computers Once the shared print queue directory is accessible from a client computer, you print to the RIP by sending print files to the mapped drive letter. Follow these steps to print to the RIP from a client computer: 1. Open a document and choose Print from the application’s File menu. 2. Choose the EPSON Stylus RIP printer driver from the Name menu. Set any print job or printer options by clicking Properties, as described on page 4-4. Click OK. 3. Since the client computer’s PostScript driver is set to print to a file (as described on page 3-4), the Print to File dialog box appears. 4-13
-
 1
1 -
2
-
3
-
4
-
5
-
6
-
7
-
8
-
9
-
10
-
11
-
12
-
13
-
14
-
15
-
16
-
17
-
18
-
19
-
20
-
21
-
22
-
23
-
24
-
25
-
26
-
27
-
28
-
29
-
30
-
31
-
32
-
33
-
34
-
35
-
36
-
37
-
38
-
39
-
40
-
41
-
42
-
43
-
44
-
45
-
46
-
47
-
48
-
49
-
50
-
51
-
52
-
53
-
54
-
55
-
56
-
57
-
58
-
 59
59 -
 60
60 -
 61
61 -
 62
62 -
 63
63 -
 64
64 -
 65
65 -
 66
66 -
 67
67 -
 68
68 -
 69
69 -
70
-
71
-
72
-
73
-
74
-
75
-
76
-
77
-
78
-
79
 |
 |
