Epson Stylus Pro User Setup Information - Mac - Page 45
Installingand Using the Printer Driver, Defining custom paper sizes
 |
View all Epson Stylus Pro manuals
Add to My Manuals
Save this manual to your list of manuals |
Page 45 highlights
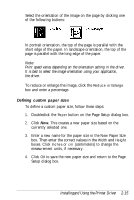
Select the orientation of the image on the page by clicking one of the following buttons: In portrait orientation, the top of the page is parallel with the short edge of the paper. In landscape orientation, the top of the page is parallel with the long edge of the paper. Note: Print speed varies depending on the orientation setting in the driver. It is best to select the image orientation using your application, not the driver. To reduce or enlarge the image, click the Reduce or Enlarge box and enter a percentage. Defining custom paper sizes To define a custom paper size, follow these steps: 1. Doubleclick the Paper button on the Page Setup dialog box. 2. Click New. This creates a new paper size based on the currently selected one. 3. Enter a new name for the paper size in the New Paper Size box. Then enter the correct values in the Width and Height boxes. Click Inches or cm (centimeters) to change the measurement units, if necessary. 4. Click OK to save the new paper size and return to the Page Setup dialog box. Installingand Using the Printer Driver 2-15
-
 1
1 -
2
-
3
-
4
-
5
-
6
-
7
-
8
-
9
-
10
-
11
-
12
-
13
-
14
-
15
-
16
-
17
-
18
-
19
-
20
-
21
-
22
-
23
-
24
-
25
-
26
-
27
-
28
-
29
-
30
-
31
-
32
-
33
-
34
-
35
-
36
-
37
-
38
-
39
-
 40
40 -
 41
41 -
 42
42 -
 43
43 -
 44
44 -
 45
45 -
 46
46 -
 47
47 -
 48
48 -
 49
49 -
 50
50 -
51
-
52
 |
 |
