Epson TM H6000 Technical Reference - Page 73
Adjusting the DIP Switches
 |
View all Epson TM H6000 manuals
Add to My Manuals
Save this manual to your list of manuals |
Page 73 highlights
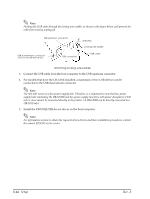
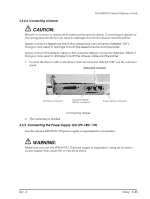
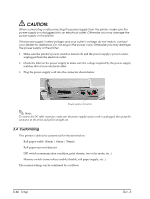
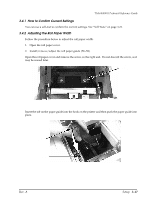
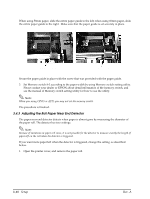
TM-H6000II Technical Reference Guide 2. Loosen the adjusting screw with a coin, and carefully move the detecting lever up. Adjusting screw Detecting lever 3. Tighten the adjusting screw, and check to be sure that the detecting lever moves freely. 4. Replace the paper roll. 3.4.4 Adjusting the DIP Switches The printer has two sets of DIP switches. The function of the DIP switches is different for each interface model. 3.4.4.1 Changing the DIP Switch Settings If you need to change settings, follow the steps below to make your changes: CAUTION: Turn off the power while removing the DIP switch cover to prevent an electric short, which can damage the printer. Use a crosshead screwdriver to remove the screw holding the DIP switch cover. 1. Make sure the printer is turned off. Rev. A Setup 3-19
-
 1
1 -
2
-
3
-
4
-
5
-
6
-
7
-
8
-
9
-
10
-
11
-
12
-
13
-
14
-
15
-
16
-
17
-
18
-
19
-
20
-
21
-
22
-
23
-
24
-
25
-
26
-
27
-
28
-
29
-
30
-
31
-
32
-
33
-
34
-
35
-
36
-
37
-
38
-
39
-
40
-
41
-
42
-
43
-
44
-
45
-
46
-
47
-
48
-
49
-
50
-
51
-
52
-
53
-
54
-
55
-
56
-
57
-
58
-
59
-
60
-
61
-
62
-
63
-
64
-
65
-
66
-
67
-
 68
68 -
 69
69 -
 70
70 -
 71
71 -
 72
72 -
 73
73 -
 74
74 -
 75
75 -
 76
76 -
 77
77 -
 78
78 -
79
-
80
-
81
-
82
-
83
-
84
-
85
-
86
-
87
-
88
-
89
-
90
-
91
-
92
-
93
-
94
-
95
-
96
-
97
-
98
-
99
-
100
-
101
-
102
-
103
-
104
-
105
-
106
-
107
-
108
-
109
-
110
-
111
-
112
-
113
-
114
-
115
-
116
-
117
-
118
-
119
-
120
-
121
-
122
 |
 |
