Epson V11H179020 User Manual - Page 16
Selecting the Projection Type (Color Mode), Adjust the synchronization until the horizontal noise
 |
UPC - 010343853997
View all Epson V11H179020 manuals
Add to My Manuals
Save this manual to your list of manuals |
Page 16 highlights
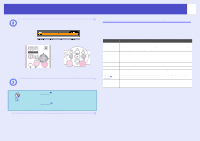
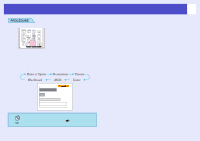
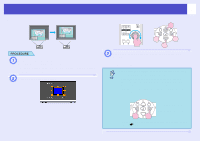
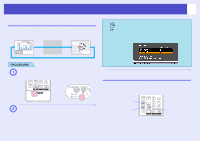
Adjusting the Image Quality 16 B Adjust the synchronization until the horizontal noise disappears from the image. Remote control Control panel The sync value increases or decreases each time a button is pressed. C Press the [Menu] button to exit the configuration menu. • Adjust the trackingg before adjusting the sync for best results. • Flickering and fuzziness may also occur when the brightness, contrastg, sharpness, zoom, and keystone correction settings are adjusted. Selecting the Projection Type (Color Mode) The following seven preset color modes are available. You can easily obtain the optimum image quality simply by selecting the color mode that corresponds to the projected images. The brightness of the images will vary depending on which color mode is selected. Mode Photo Sports Presentation Theatre Game sRGBg Blackboard Application (When computer and RGB video images are being input) The images are vivid and brought into contrast. Ideal for projecting still pictures, such as photos, in a bright room. (When component video, S-video, or composite video images are being input) The images are vivid and brought to life. Ideal for watching TV programmes and so on in a bright room. Ideal for giving presentations in a bright room Gives images a natural tone. Ideal for watching films in a dark room. Excels at emphasising dark gradations. Ideal for playing video games in a bright room. Ideal for images that conform to the sRGB color standard Even if you are projecting onto a blackboard (green board), this setting gives your images a natural tint, just like when projecting onto a screen
-
 1
1 -
2
-
3
-
4
-
5
-
6
-
7
-
8
-
9
-
10
-
 11
11 -
 12
12 -
 13
13 -
 14
14 -
 15
15 -
 16
16 -
 17
17 -
 18
18 -
 19
19 -
 20
20 -
 21
21 -
22
-
23
-
24
-
25
-
26
-
27
-
28
-
29
-
30
-
31
-
32
-
33
-
34
-
35
-
36
-
37
-
38
-
39
-
40
-
41
-
42
-
43
-
44
-
45
-
46
-
47
-
48
-
49
-
50
-
51
-
52
-
53
-
54
-
55
-
56
-
57
-
58
-
59
-
60
-
61
-
62
-
63
-
64
-
65
-
66
-
67
-
68
-
69
-
70
-
71
-
72
-
73
-
74
-
75
-
76
-
77
-
78
-
79
-
80
-
81
-
82
-
83
 |
 |
