Epson V550 Users Guide - Page 54
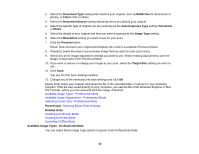
Black & White
 |
View all Epson V550 manuals
Add to My Manuals
Save this manual to your list of manuals |
Page 54 highlights
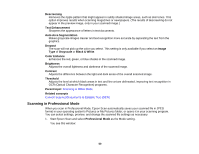
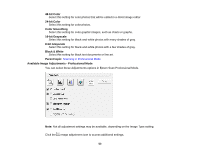
Click the + (Windows) or (Mac OS X) icon next to a setting to change the level of adjustment. Unsharp Mask Makes the edges of certain image areas clearer. Turn off this option to leave softer edges. Descreening Removes the ripple pattern that might appear in subtly shaded image areas, such as skin tones. This option improves results when scanning magazines or newspapers. (The results of descreening do not appear in the preview image, only in your scanned image.) Color Restoration Restores the colors in faded photos automatically. Backlight Correction Removes shadows from photos that have too much background light. Dust Removal Removes dust marks from your originals automatically. DIGITAL ICE Technology DIGITAL ICE removes dust and scratch marks from photos. It cannot be used with the Dust Removal option. The effects of DIGITAL ICE Technology will not appear in the Preview of the image. You must scan the original to see the results. Dropout The scan will not pick up the color you select. This setting is only available if you select an Image Type of Grayscale or Black & White. Color Enhance Enhances the red, green, or blue shades in the scanned image. Auto Exposure Automatically adjusts the image exposure settings when you click the Auto Exposure icon. To automatically adjust image exposure settings continuously, click the Configuration button, click the Color tab, and select Continuous auto exposure. You can adjust the level of auto exposure using a slider. Histogram Adjustment Provides a graphical interface for adjusting highlight, shadow, and gamma levels individually. (For advanced users only.) Click the histogram icon to access the settings. Tone Correction Provides a graphical interface for adjusting tone levels individually. (For advanced users only.) Click the tone correction icon to access the settings. 54
-
 1
1 -
2
-
3
-
4
-
5
-
6
-
7
-
8
-
9
-
10
-
11
-
12
-
13
-
14
-
15
-
16
-
17
-
18
-
19
-
20
-
21
-
22
-
23
-
24
-
25
-
26
-
27
-
28
-
29
-
30
-
31
-
32
-
33
-
34
-
35
-
36
-
37
-
38
-
39
-
40
-
41
-
42
-
43
-
44
-
45
-
46
-
47
-
48
-
 49
49 -
 50
50 -
 51
51 -
 52
52 -
 53
53 -
 54
54 -
 55
55 -
 56
56 -
 57
57 -
 58
58 -
 59
59 -
60
-
61
-
62
-
63
-
64
-
65
-
66
-
67
-
68
-
69
-
70
-
71
-
72
-
73
-
74
-
75
-
76
-
77
-
78
-
79
-
80
-
81
-
82
-
83
-
84
-
85
-
86
-
87
-
88
-
89
-
90
-
91
-
92
-
93
-
94
-
95
-
96
-
97
-
98
-
99
-
100
-
101
-
102
-
103
-
104
-
105
-
106
-
107
-
108
-
109
-
110
-
111
-
112
-
113
-
114
-
115
-
116
-
117
-
118
 |
 |