Epson V550 Users Guide - Page 73
Uploading Scanned Images to Email, Scanning to Facebook and Other Destinations
 |
View all Epson V550 manuals
Add to My Manuals
Save this manual to your list of manuals |
Page 73 highlights
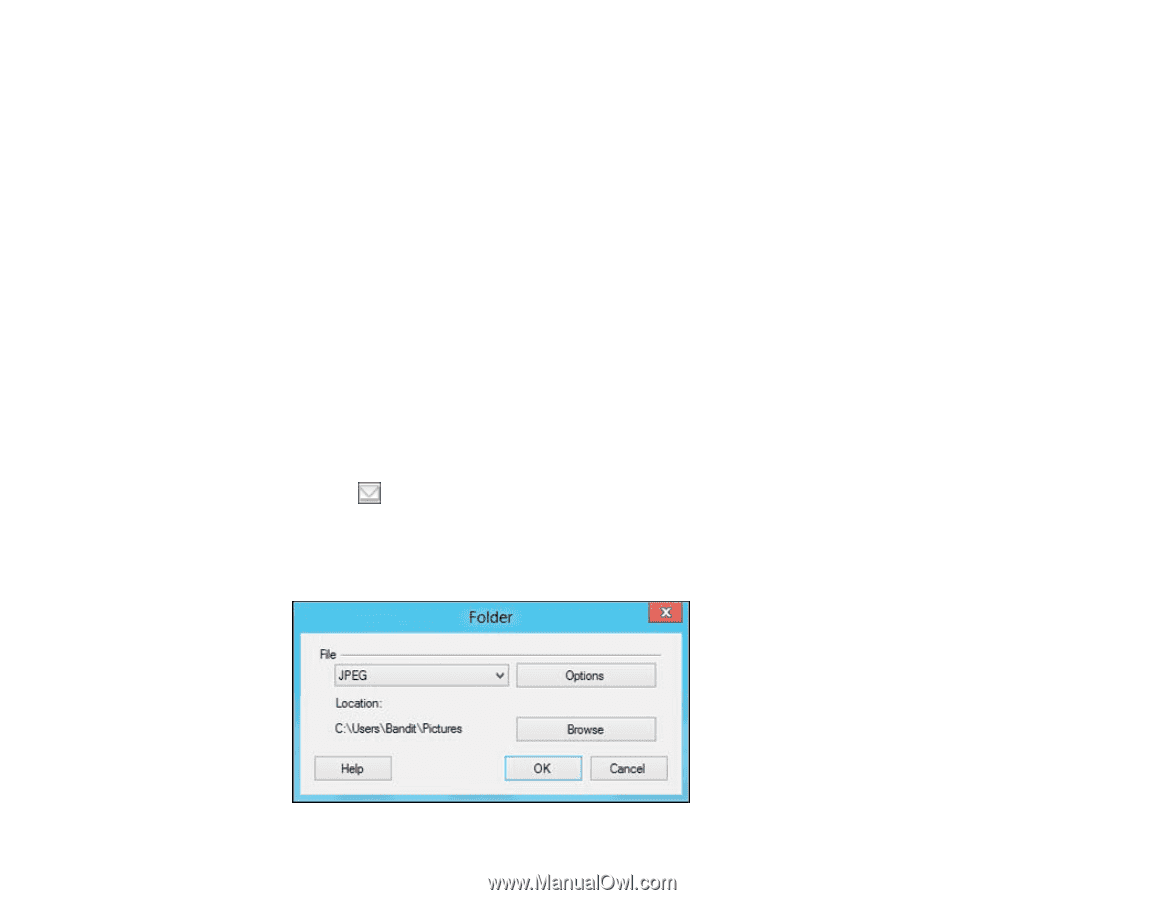
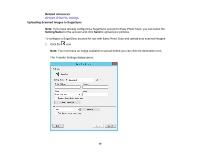
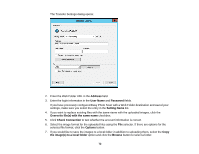
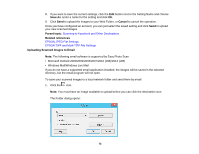
8. If you want to save the current settings, click the Edit button next to the Setting Name and choose Save As. Enter a name for the setting and click OK. 9. Click Send to upload the images to your Web Folder, or Cancel to cancel the operation. Once you have configured an account, you can just select the saved setting and click Send to upload your new scanned images. Parent topic: Scanning to Facebook and Other Destinations Related references EPSON JPEG File Settings EPSON TIFF and Multi-TIFF File Settings Uploading Scanned Images to Email Note: The following email software is supported by Easy Photo Scan. • Microsoft Outlook 2000/2002/2003/2007/2010 (x86)/2013 (x86) • Windows Mail/Windows Live Mail If you do not have a supported email application installed, the images will be saved in the selected directory, but the email program will not open. To save your scanned images to a local network folder and send them by email: 1. Click the icon. Note: You must have an image available to upload before you can click the destination icon. The Folder dialog opens: 73
-
 1
1 -
2
-
3
-
4
-
5
-
6
-
7
-
8
-
9
-
10
-
11
-
12
-
13
-
14
-
15
-
16
-
17
-
18
-
19
-
20
-
21
-
22
-
23
-
24
-
25
-
26
-
27
-
28
-
29
-
30
-
31
-
32
-
33
-
34
-
35
-
36
-
37
-
38
-
39
-
40
-
41
-
42
-
43
-
44
-
45
-
46
-
47
-
48
-
49
-
50
-
51
-
52
-
53
-
54
-
55
-
56
-
57
-
58
-
59
-
60
-
61
-
62
-
63
-
64
-
65
-
66
-
67
-
 68
68 -
 69
69 -
 70
70 -
 71
71 -
 72
72 -
 73
73 -
 74
74 -
 75
75 -
 76
76 -
 77
77 -
 78
78 -
79
-
80
-
81
-
82
-
83
-
84
-
85
-
86
-
87
-
88
-
89
-
90
-
91
-
92
-
93
-
94
-
95
-
96
-
97
-
98
-
99
-
100
-
101
-
102
-
103
-
104
-
105
-
106
-
107
-
108
-
109
-
110
-
111
-
112
-
113
-
114
-
115
-
116
-
117
-
118
 |
 |