Garmin GPS 12XL Owner's Manual (Software Version 4.0 and above) - Page 12
Power On &, Marking a, Position - manual
 |
UPC - 753759007034
View all Garmin GPS 12XL manuals
Add to My Manuals
Save this manual to your list of manuals |
Page 12 highlights
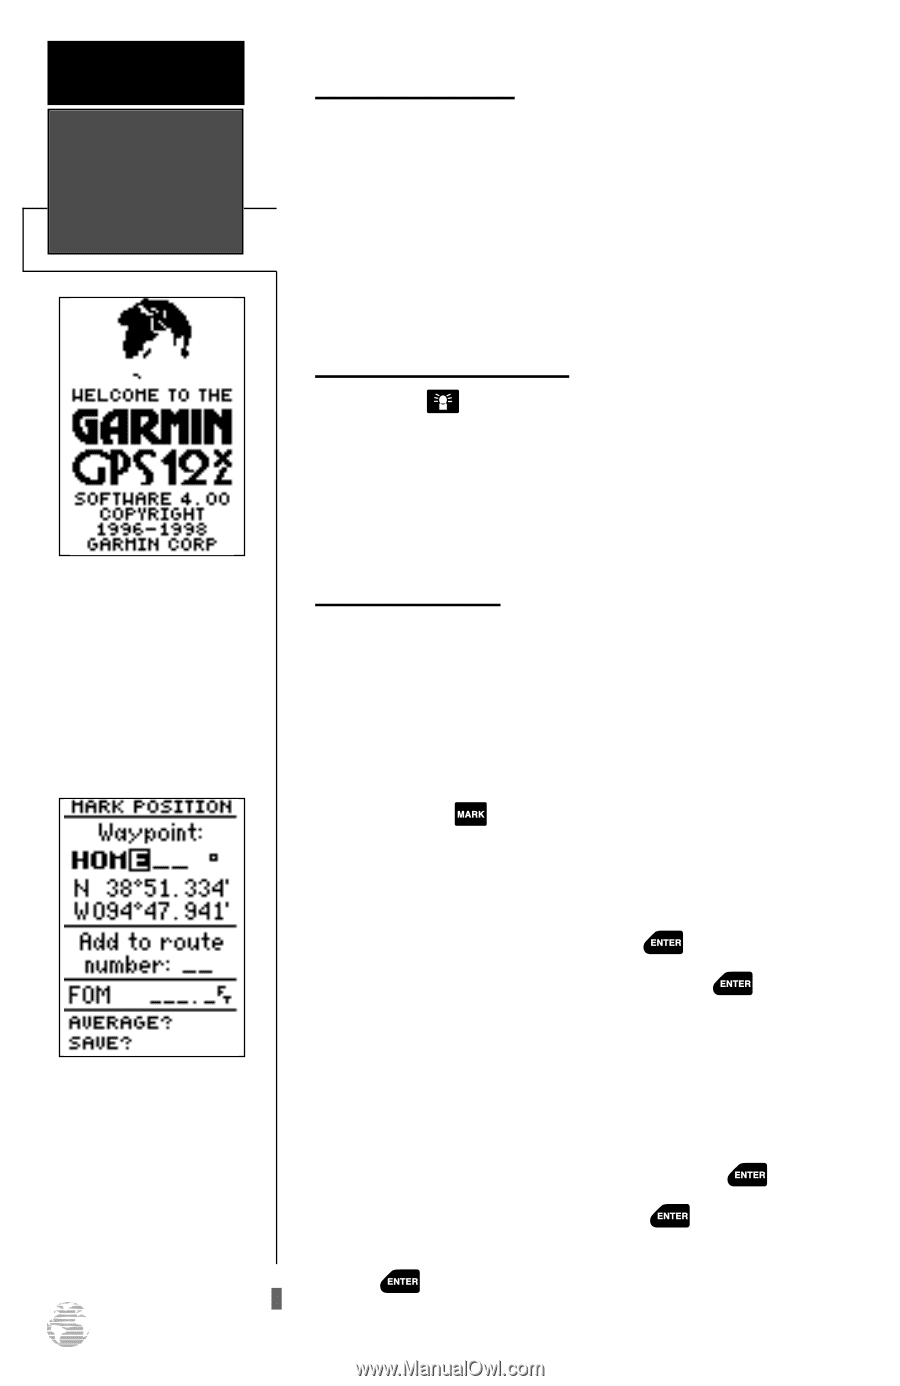
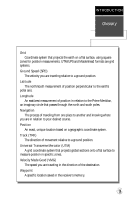
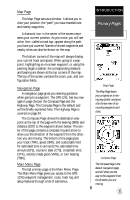
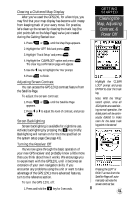
GETTING STARTED Power On & Marking a Position The welcome page will be shown while the unit conducts a self test. When the Database Page appears, press PAGE to quickly move on to the Satellite Page. Press the UP arrow to move forward through the alphabet or numbers and the DOWN arrow to move backward. 8 Getting Started Tour Now that you've seen the primary pages, let's get started by taking a simple tour to show you the basics about using your GPS 12XL. The tour assumes that your unit has been turned on and that none of the factory settings ( units of measure, selectable fields, etc.) have been changed. If these settings have been changed, the pictures and descriptions you see in this manual may not match what you see on your screen. Turning the GPS 12XL On 1. Press until the receiver turns on. The welcome page will appear while the unit conducts a self test. Once testing is complete, the Database Page will appear, followed by the Satellite Page. When sufficient satellite signals have been acquired, the Satellite Page will be replaced by the Position Page. Marking a Position GPS is really about marking and going to places called waypoints. Before we can use our GPS 12XL to guide us somewhere, we have to mark a position as a waypoint. (Your GPS 12XL can hold up to 500 waypoints.) To mark your present position: 1. Press the key. The mark position page will appear, with a default three-digit name for the new waypoint in the upper-left portion of the page. To rename the waypoint: 1. Highlight the name field, and press . 2. Enter the waypoint name 'HOME', and press . (See pg. 5 for data entry.) The waypoint symbol field will become highlighted. Each waypoint may also be assigned a custom waypoint symbol for easy waypoint recognition on the map. To change the waypoint symbol: 1. Highlight the waypoint symbol field, and press . 2. Select the house symbol, and press . 3. Move the cursor to the 'DONE?' prompt, and press .
-
 1
1 -
2
-
3
-
4
-
5
-
6
-
 7
7 -
 8
8 -
 9
9 -
 10
10 -
 11
11 -
 12
12 -
 13
13 -
 14
14 -
 15
15 -
 16
16 -
 17
17 -
18
-
19
-
20
-
21
-
22
-
23
-
24
-
25
-
26
-
27
-
28
-
29
-
30
-
31
-
32
-
33
-
34
-
35
-
36
-
37
-
38
-
39
-
40
-
41
-
42
-
43
-
44
-
45
-
46
-
47
-
48
-
49
-
50
-
51
-
52
-
53
-
54
-
55
-
56
-
57
-
58
-
59
-
60
-
61
-
62
-
63
-
64
-
65
-
66
 |
 |