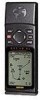
Garmin GPS 12XL Owner's Manual (Software Version 4.0 and above) - Page 41
Waypoint, Display &, Marking Cursor
 |
UPC - 753759007034
View all Garmin GPS 12XL manuals
Add to My Manuals
Save this manual to your list of manuals |
Page 41 highlights
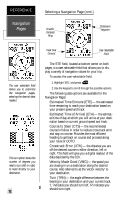
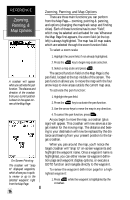
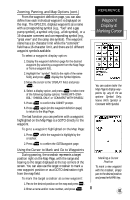
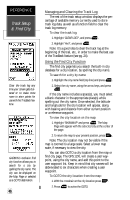
Zooming, Panning, and Map Options (cont.) From the waypoint definition page, you can also define how each individual waypoint is displayed on the map. The GPS 12XL displays waypoints as a name with a corresponding symbol (e.g., "fuel" and a gas pump symbol), a symbol only (e.g., a fish symbol), or a 16-character comment and corresponding symbol (e.g., "great view" and the camp site symbol). The waypoint name has a six character limit while the "comment" field has a 16-character limit, and there are 16 different waypoint symbols available. To select a waypoint display option: 1. Display the waypoint definition page for the desired waypoint (by selecting a waypoint from the Map Page or from a waypoint list). 2. Highlight the "symbol" field (to the right of the name field), and press display the Symbol Options. 3. Move the cursor to the 'DISPLAY' field, and press . 4. Select a display option, and press to select one of the following display options: 'NAME WITH SYMBOL,' 'SYMBOL ONLY,' or 'COMMENT WITH SYMBOL.' 5. Press to confirm the 'DONE?' prompt. 6. Press again (on the waypoint definition page) to return to the Map Page. The last function you can perform with a waypoint highlighted on the Map Page is a GOTO directly to the waypoint. To go to a waypoint highlighted on the Map Page: 1. Press while the waypoint is highlight by the crosshair. 2. Press to confirm the GOTOwaypoint page. Using the Cursor to Mark and Go to Waypoints During panning, the crosshair represents a target position right on the Map Page, with the range and bearing to the target displayed at the top corners of the screen. You can also use the target crosshair to mark a new waypoint position or as a GOTO destination right from the map field. To mark the target crosshair as a new waypoint: 1. Pan to the desired position on the map and press . 2. Enter a name and/or route number, and press . REFERENCE Waypoint Display & Marking Cursor You can custom tailor the Map Page to display waypoints by any of three options: Symbol Only, Name With Symbol or Comment With Symbol. Marking a Cursor Position To mark a new waypoint with the crosshair, simply pan to the desired position and press the MARK key. 37
-
 1
1 -
2
-
3
-
4
-
5
-
6
-
7
-
8
-
9
-
10
-
11
-
12
-
13
-
14
-
15
-
16
-
17
-
18
-
19
-
20
-
21
-
22
-
23
-
24
-
25
-
26
-
27
-
28
-
29
-
30
-
31
-
32
-
33
-
34
-
35
-
 36
36 -
 37
37 -
 38
38 -
 39
39 -
 40
40 -
 41
41 -
 42
42 -
 43
43 -
 44
44 -
 45
45 -
 46
46 -
47
-
48
-
49
-
50
-
51
-
52
-
53
-
54
-
55
-
56
-
57
-
58
-
59
-
60
-
61
-
62
-
63
-
64
-
65
-
66
 |
 |
