Garmin tactix Bravo Owner s Manual PDF - Page 11
Activity Tracking - hr
 |
View all Garmin tactix Bravo manuals
Add to My Manuals
Save this manual to your list of manuals |
Page 11 highlights
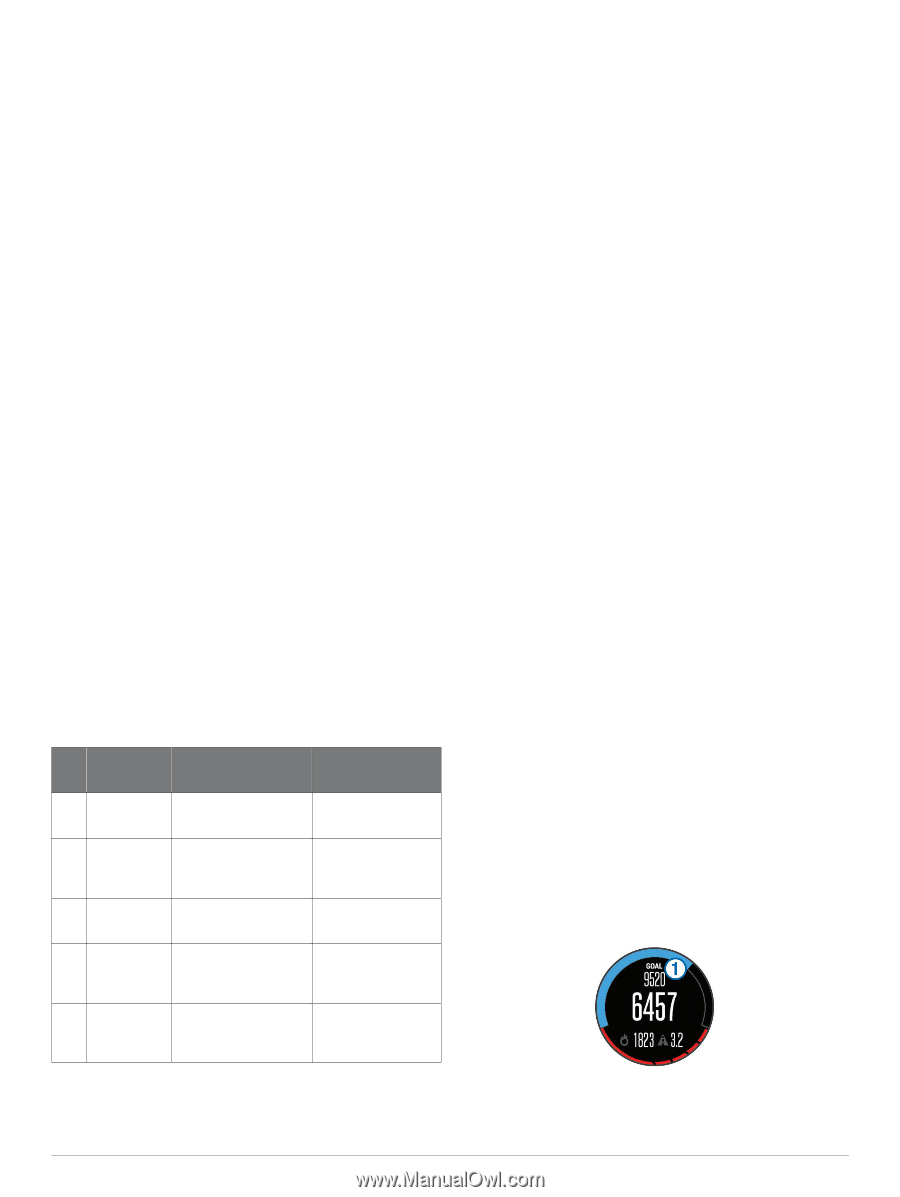
can manually adjust your zones on the device or using your Garmin Connect account. 1 Hold UP. 2 Select My Stats > User Profile > Heart Rate Zones. 3 Select Default to view the default values (optional). The default values can be applied to running, cycling, and swimming. 4 Select Running, Cycling, or Swimming. 5 Select Preference > Set Custom. 6 Select Max. HR, and enter your maximum heart rate. 7 Select LTHR, and enter your lactate threshold heart rate. You can perform a guided test to estimate your lactate threshold (Lactate Threshold, page 21). 8 Select Resting HR, and enter your resting heart rate. 9 Select Zones > Based On. 10Select an option: • Select BPM to view and edit the zones in beats per minute. • Select %Max. HR to view and edit the zones as a percentage of your maximum heart rate. • Select %HRR to view and edit the zones as a percentage of your heart rate reserve (maximum heart rate minus resting heart rate). • Select %LTHR to view and edit the zones as a percentage of your lactate threshold heart rate. 11Select a zone, and enter a value for each zone. Letting the Device Set Your Heart Rate Zones The default settings allow the device to detect your maximum heart rate and set your heart rate zones as a percentage of your maximum heart rate. • Verify that your user profile settings are accurate (Setting Up Your User Profile, page 6). • Run often with your compatible heart rate monitor. • Try a few heart rate training plans, available from your Garmin Connect account. • View your heart rate trends and time in zones using your Garmin Connect account. Heart Rate Zone Calculations Zone % of Maximum Heart Rate 1 50-60% 2 60-70% 3 70-80% 4 80-90% 5 90-100% Perceived Exertion Benefits Relaxed, easy pace, rhythmic breathing Beginning-level aerobic training, reduces stress Comfortable pace, slightly deeper breathing, conversation possible Basic cardiovascular training, good recovery pace Moderate pace, more difficult to hold conversation Improved aerobic capacity, optimal cardiovascular training Fast pace and a bit Improved anaerobic uncomfortable, breathing capacity and forceful threshold, improved speed Sprinting pace, unsustainable for long period of time, labored breathing Anaerobic and muscular endurance, increased power Setting Your Power Zones The values for the zones are default values and may not match your personal abilities. If you know your functional threshold power (FTP) value, you can enter it and allow the software to calculate your power zones automatically. You can manually adjust your zones on the device or using your Garmin Connect account. 1 Hold UP. 2 Select My Stats > User Profile > Power Zones > Based On. 3 Select an option: • Select Watts to view and edit the zones in watts. • Select % FTP to view and edit the zones as a percentage of your functional threshold power. 4 Select FTP, and enter your FTP value. 5 Select a zone, and enter a value for each zone. 6 If necessary, select Minimum, and enter a minimum power value. Activity Tracking Turning On Activity Tracking The activity tracking feature records your daily step count, distance traveled, intensity minutes, floors climbed, calories burned, and sleep statistics for each recorded day. Your calories burned includes your base metabolism plus activity calories. Activity tracking can be enabled during the initial device setup, or at any time. NOTE: Turning on activity tracking can decrease the battery life between charges. 1 Hold UP. 2 Select Settings > Activity Tracking > Status > On. Your step count does not appear until the device locates satellites and sets the time automatically. The device may need a clear view of the sky to locate satellite signals. The number of steps taken during the day appears on an activity tracking widget. The step count is updated periodically. Using the Move Alert Before you can use the move alert, you must turn on activity tracking and the move alert (Turning On Activity Tracking, page 7). Sitting for prolonged periods of time can trigger undesirable metabolic state changes. The move alert reminds you to keep moving. After one hour of inactivity, Move! and the red bar appear. The device also beeps or vibrates if audible tones are turned on (System Settings, page 17). Go for a short walk (at least a couple of minutes) to reset the move alert. Auto Goal Your device creates a daily step goal automatically, based on your previous activity levels. As you move during the day, the device shows your progress toward your daily goal . À About Lifetime Athletes A lifetime athlete is an individual who has trained intensely for many years (with the exception of minor injuries) and has a resting heart rate of 60 beats per minute (bpm) or less. If you choose not to use the auto goal feature, you can set a personalized step goal on your Garmin Connect account. Training 7
-
 1
1 -
2
-
3
-
4
-
5
-
 6
6 -
 7
7 -
 8
8 -
 9
9 -
 10
10 -
 11
11 -
 12
12 -
 13
13 -
 14
14 -
 15
15 -
 16
16 -
17
-
18
-
19
-
20
-
21
-
22
-
23
-
24
-
25
-
26
-
27
-
28
-
29
-
30
-
31
-
32
-
33
-
34
 |
 |