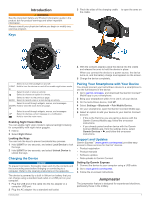
Garmin tactix Bravo Owner s Manual PDF - Page 9
Water Sports, Hiking, Multisport, Indoor Activities, Projecting a Waypoint - gps
 |
View all Garmin tactix Bravo manuals
Add to My Manuals
Save this manual to your list of manuals |
Page 9 highlights
4 Select to start the timer. History is recorded only while the timer is running. 5 Start your activity. 6 Select LAP to record an interval (optional). 7 Select UP or DOWN to view additional data pages (optional). 8 After you complete your activity, select > Save. Water Sports Starting a Stand Up Paddle Boarding Activity 1 Pair your ANT+ sensor, such as a heart rate monitor (optional). 2 From the clock, select . 3 Select SUP. 4 When using optional ANT+ sensors, wait while the device connects to the sensors. 5 Go outside, and wait while the device locates satellites. 6 Select to start the timer. History is recorded only while the timer is running. 7 Start your activity. 8 Select UP or DOWN to view additional data pages (optional). 9 After you complete your activity, select > Save. Starting a Rowing Activity 1 Pair your ANT+ sensor, such as a heart rate monitor (optional). 2 From the clock, select . 3 Select Row. 4 When using optional ANT+ sensors, wait while the device connects to the sensors. 5 Go outside, and wait while the device locates satellites. 6 Select to start the timer. History is recorded only while the timer is running. 7 Start your activity. 8 Select UP or DOWN to view additional data pages (optional). 9 After you complete your activity, select > Save. Hiking Going for a Hike Before you go for a hike, you should charge the device (Charging the Device, page 1). 1 From the clock, select . 2 Select Hike. 3 Go outside, and wait while the device locates satellites. 4 Select to start the timer. History is recorded only while the timer is running. 5 Start your activity. The device records a track while you hike. 6 Select UP or DOWN to view additional data pages (optional). 7 After you complete your activity, select > Save. Multisport Triathletes, duathletes, and other multisport competitors can take advantage of the multisport activity. During a multisport activity, you can transition between activities and continue to view your total time and distance. For example, you can switch from biking to running and view your total time and distance for biking and running throughout the multisport activity. You can customize a multisport activity, or you can use the default multisport activity set up for a standard triathlon. Starting a Triathlon or Multisport Activity Before you start an activity, you should charge the device (Charging the Device, page 1). Before you can use an ANT+ sensor, you must pair the sensor with your device (Pairing ANT+ Sensors, page 18). 1 Pair your ANT+ sensors, such as a foot pod or heart rate monitor (optional). 2 From the clock, select . 3 Select Triathlon or a custom multisport activity. 4 Go outside, and wait while the device locates satellites. 5 Select to start the timer. History is recorded only while the timer is running. 6 Start your first activity. 7 Select LAP to transition to the next activity. If transitions are turned on, the transition time is recorded separately from the activity times. 8 If necessary, select LAP to start the next activity. 9 Select UP or DOWN to view additional data pages (optional). 10After you complete your activity, select > Save. Creating a Custom Activity 1 Hold UP. 2 Select Settings > Apps > Add New. 3 Select an activity type. NOTE: If you are creating a custom multisport activity, you are prompted to select two or more activities and include transitions. 4 If necessary, select an accent color. 5 If necessary, select an icon. 6 Select a name or enter a custom name. Duplicate activity names include a number, for example: Triathlon(2). 7 Select an option: • Select Use Default to create your custom activity starting from the default system settings. • Select a copy of an existing activity to create your custom activity starting from one of your saved activities. 8 If necessary, select the GPS mode. 9 Select an option: • Select Done to save and use the custom activity. • Select Edit Settings to customize specific activity settings. Indoor Activities The tactix Bravo device can be used for training indoors, such as running on an indoor track or using a stationary bike. GPS is turned off for indoor activities. When running with GPS turned off, speed, distance, and cadence are calculated using the accelerometer in the device. The accelerometer is selfcalibrating. The accuracy of the speed, distance, and cadence data improves after a few outdoor runs using GPS. Projecting a Waypoint You can create a new location by projecting the distance and bearing from your current location to a new location. 1 If necessary, add the project waypoint app to the apps list (Activity App Settings, page 14). 2 Select > Project Wpt.. 3 Select UP or DOWN to set the heading. 4 Select . 5 Select DOWN to select a unit of measure. Activities 5
-
 1
1 -
2
-
3
-
 4
4 -
 5
5 -
 6
6 -
 7
7 -
 8
8 -
 9
9 -
 10
10 -
 11
11 -
 12
12 -
 13
13 -
 14
14 -
15
-
16
-
17
-
18
-
19
-
20
-
21
-
22
-
23
-
24
-
25
-
26
-
27
-
28
-
29
-
30
-
31
-
32
-
33
-
34
 |
 |
