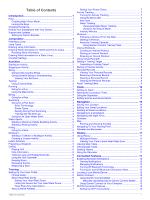
Garmin tactix Bravo Owner s Manual PDF - Page 7
Starting an Activity, Stopping an Activity, Skiing, Tactical, Running - gps watch
 |
View all Garmin tactix Bravo manuals
Add to My Manuals
Save this manual to your list of manuals |
Page 7 highlights
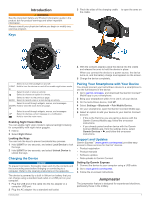
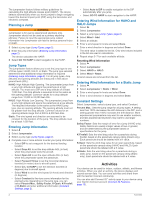
Starting an Activity When you start an activity, GPS turns on automatically (if required). When you stop the activity, the device returns to watch mode. 1 From the clock, select . 2 Select an activity. 3 If necessary, follow the on-screen instructions to enter additional information. 4 If necessary, wait while the device connects to your ANT+® sensors. 5 If the activity requires GPS, go outside, and wait while the device locates satellites. 6 Select to start the timer. NOTE: The device does not record your activity data until you start the timer. Stopping an Activity NOTE: Some options are not available for some activities. 1 Select . If you do not save the activity manually after stopping the activity, the device saves it automatically after 25 minutes have passed. 2 Select an option: • To save the activity and return to watch mode, select Save. • To discard the activity and return to watch mode, select Discard. • To follow your track back to the starting point of your activity, select TracBack. Skiing Going Cross-Country Skiing Before you go skiing, you should charge the device (Charging the Device, page 1). 1 From the clock, select . 2 Select XC Ski. 3 Go outside, and wait while the device locates satellites. 4 Select to start the timer. History is recorded only while the timer is running. 5 Start your activity. 6 Select LAP to record laps (optional). 7 Select UP or DOWN to view additional data pages (optional). 8 After you complete your activity, select > Save. Going Downhill Skiing or Snowboarding Before you go skiing or snowboarding, you should charge the device (Charging the Device, page 1). 1 From the clock, select . 2 Select Ski / Board. 3 Go outside, and wait while the device locates satellites. 4 Select to start the timer. History is recorded only while the timer is running. 5 Start your activity. The auto run feature is turned on by default. This feature automatically records new ski runs based on your movement. The timer pauses when you stop moving downhill and when you are on a chairlift. The timer remains paused during the chairlift ride. 6 If necessary, start moving downhill to restart the timer. 7 Select UP or DOWN to view additional data pages (optional). 8 After you complete your activity, select > Save. Viewing Your Ski Runs Your device records the details of each skiing or snowboarding run. You can view run details from the paused screen or while the timer is running. 1 Start a skiing or snowboarding activity. 2 Hold UP. 3 Select View Runs. 4 Select UP and DOWN to view details of your last run, your current run, and your total runs. The run screens include time, distance traveled, maximum speed, average speed, and total descent. Tactical Using Tactical Mode Before you use tactical mode, you should charge the device (Charging the Device, page 1). 1 From the clock, select . 2 Select Tactical. 3 Go outside, and wait while the device locates satellites. 4 Select to start the timer. History is recorded only while the timer is running. 5 Start your activity. The device records a track while you walk. 6 Select UP or DOWN to view additional data pages (optional). 7 After you complete your activity, select > Save. Running Going for a Run Before you go for a run, you should charge the device (Charging the Device, page 1). Before you can use an ANT+ sensor for your run, you must pair the sensor with your device (Pairing ANT+ Sensors, page 18). 1 Put on your ANT+ sensors, such as a foot pod or heart rate monitor (optional). 2 From the clock, select . 3 Select Run. 4 When using optional ANT+ sensors, wait while the device connects to the sensors. 5 Go outside, and wait while the device locates satellites. 6 Select to start the timer. History is recorded only while the timer is running. 7 Start your activity. 8 Select LAP to record laps (optional). 9 Select UP or DOWN to view additional data pages (optional). 10After you complete your activity, select > Save. Using the Metronome The metronome feature plays tones at a steady rhythm to help you improve your performance by training at a faster, slower, or more consistent cadence. 1 Hold UP. 2 Select Settings > Apps. 3 Select an activity. NOTE: This feature is not available for all activities. 4 Select Metronome > Status > On. 5 Select an option: • Select Beats / Minute to enter a value based on the cadence you want to maintain. Activities 3
-
 1
1 -
 2
2 -
 3
3 -
 4
4 -
 5
5 -
 6
6 -
 7
7 -
 8
8 -
 9
9 -
 10
10 -
 11
11 -
 12
12 -
13
-
14
-
15
-
16
-
17
-
18
-
19
-
20
-
21
-
22
-
23
-
24
-
25
-
26
-
27
-
28
-
29
-
30
-
31
-
32
-
33
-
34
 |
 |
