Gigabyte GSmart G1317D User Manual - GSmart G1317D English Version - Page 32
Bluetooth modes, SIM1/SIM2 > GSM/UMTS Options >Access
 |
View all Gigabyte GSmart G1317D manuals
Add to My Manuals
Save this manual to your list of manuals |
Page 32 highlights
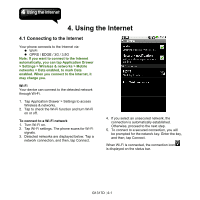
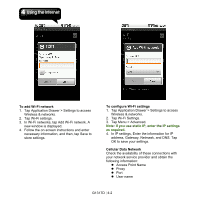
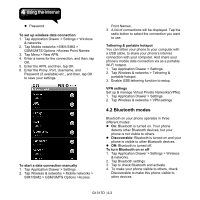
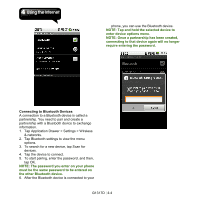
Password To set up wireless data connection 1. Tap Application Drawer > Settings > Wireless & networks. 2. Tap Mobile networks >SIM1/SIM2 > GSM/UMTS Options >Access Point Names. 3. Tap Menu > New APN. 4. Enter a name for the connection, and then, tap OK. 5. Enter the APN, and then, tap OK. 6. Enter the Proxy, Port, Username, and Password (if available) etc., and then, tap OK to save your settings. To start a data connection manually 1. Tap Application Drawer > Settings. 2. Tap Wireless & networks > Mobile networks > SIM1/SIM2 > GSM/UMTS Options >Access Point Names. 3. A list of connections will be displayed. Tap the radio button to select the connection you want to use. Tethering & portable hotspot You can tether your phone to your computer with a USB cable, to share your phone's internet connection with your computer. And share your phone's mobile data connection via as a portable Wi-Fi hotspot. 1. Tap Application Drawer > Settings. 2. Tap Wireless & networks > Tethering & portable hotspot. 3. Enable USB tethering function to setup. VPN settings Set up & manage Virtual Private Networks(VPNs) 1. Tap Application Drawer > Settings. 2. Tap Wireless & networks > VPN settings 4.2 Bluetooth modes Bluetooth on your phone operates in three different modes: On: Bluetooth is turned on. Your phone detects other Bluetooth devices, but your phone is not visible to others. Discoverable: Bluetooth is turned on and your phone is visible to other Bluetooth devices. Off: Bluetooth is turned off. To turn Bluetooth on or off 1. Tap Application Drawer > Settings > Wireless & networks. 2. Tap Bluetooth settings. 3. Tap to check Bluetooth and activate. 4. To make your phone visible to others, check Discoverable to make this phone visible to other devices. G1317D│4-3
-
 1
1 -
2
-
3
-
4
-
5
-
6
-
7
-
8
-
9
-
10
-
11
-
12
-
13
-
14
-
15
-
16
-
17
-
18
-
19
-
20
-
21
-
22
-
23
-
24
-
25
-
26
-
 27
27 -
 28
28 -
 29
29 -
 30
30 -
 31
31 -
 32
32 -
 33
33 -
 34
34 -
 35
35 -
 36
36 -
 37
37 -
38
-
39
-
40
-
41
-
42
-
43
-
44
-
45
-
46
-
47
-
48
-
49
-
50
-
51
-
52
-
53
-
54
-
55
-
56
-
57
 |
 |