Gigabyte GSmart G1317D User Manual - GSmart G1317D English Version - Page 49
News and Weather, 19 Best Choice, 20 USB Manager, 21 Install USB Driver, 22 Android Manager
 |
View all Gigabyte GSmart G1317D manuals
Add to My Manuals
Save this manual to your list of manuals |
Page 49 highlights
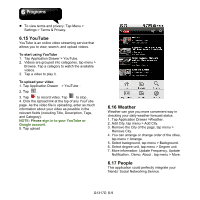
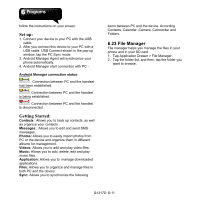
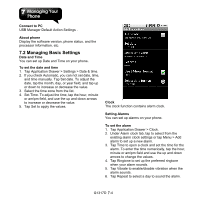
1. Tap Application Drawer > People. 2. This application could perfectly integrate your social network services with your contacts on an Android phone. Please read the End User License Agreements carefully and press "Agree" to go next step. 3. Please insert your personal information that will be displayed on the self-page. When finish, press "OK" to go next step. 4. To select your friends from the contact list, or press "All" to include all. When finish, press "OK" to go next step. 5. Select an icon of social network service that you are using. Log in the service. When the icon lights on, it means log in successfully. 6.18 News and Weather News and weather shows the city current conditions, temperature and allowing customization showing/hiding various news categories and even creating your own. 1. Tap Application Drawer > News and Weather. 2. Tap menu > Settings > News settings .You can select news topic, Prefetch articles, Prefetch images .And read the News terms of service. 3. To instruct the device you can select: Use my location, Set location or Use metric. Tap menu > Settings > Weather settings. 4. Select Auto-refresh , Refresh interval , and check the Refresh status, tap menu > Settings > Refresh settings. 5. Tap menu> Refresh, to update information. 6. Application version, Tap menu > Settings. 6.19 Best Choice Allows you to use the phone more easily, we recommend and provide you the best software and functionality. With this function can easily find links to the services you need. 1. Tap Application Drawer > Best Choice. 2. Click the desired function links to the download page. 6.20 USB Manager There will be 4 modes of USB Manager after your device connecting with PC: 1. Data storage: Storage mode. Insert the memory card, tap Data storage, your PC will pop-up a message to ask if you want to use data storage and file manager. 2. PC Sync: Android Manager mode。 Tap PC Sync, your device will connect and access Android Manager Agent. Your PC will need to open Android Manager to sync up with the device. 3. Data Card : Data card mode。 Tap Data Card, you can use your phone as a modem, Share your data connection with other devices. 4. Charger: Charging mode。 Tap Charger to start charging.。 6.21 Install USB Driver 1. Connect your device with PC by the USB cable, and then, your PC will pop-up a message. Select "Open folder to view files." 2. Tap the "Setup.exe" in the USB Driver Installer folder in your PC. 3. Pop up the installing windows of GSmart Driver. Wait for a few seconds for the process, then tap "Done" to have the process completed. 6.22 Android Manager You may use Android Manager to Synchronize data in this device with your PC. Download Android Manager from GSmart's official website. Support for Windows XP, Windows Vista, Windows 7 and G1317D│6-10
-
 1
1 -
2
-
3
-
4
-
5
-
6
-
7
-
8
-
9
-
10
-
11
-
12
-
13
-
14
-
15
-
16
-
17
-
18
-
19
-
20
-
21
-
22
-
23
-
24
-
25
-
26
-
27
-
28
-
29
-
30
-
31
-
32
-
33
-
34
-
35
-
36
-
37
-
38
-
39
-
40
-
41
-
42
-
43
-
 44
44 -
 45
45 -
 46
46 -
 47
47 -
 48
48 -
 49
49 -
 50
50 -
 51
51 -
 52
52 -
 53
53 -
 54
54 -
55
-
56
-
57
 |
 |