HTC P3470 User Manual - Page 27
Calibrate the device, Manage screen settings, Restart, Start > Settings > System, > Screen
 |
View all HTC P3470 manuals
Add to My Manuals
Save this manual to your list of manuals |
Page 27 highlights
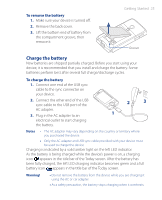
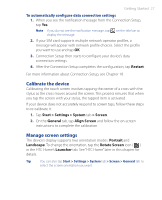
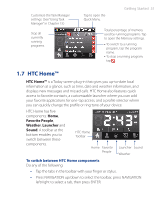
Getting Started 27 To automatically configure data connection settings 1. When you see the notification message from the Connection Setup, tap Yes. Note If you do not see the notification message, tap on the title bar to display the message. 2. If your SIM card supports multiple network operator profiles, a message will appear with network profile choices. Select the profile you want to use and tap OK. 3. Connection Setup then starts to configure your device's data connection settings. 4. After the Connection Setup completes the configuration, tap Restart. For more information about Connection Setup, see Chapter 10. Calibrate the device Calibrating the touch screen involves tapping the center of a cross with the stylus as the cross moves around the screen. This process ensures that when you tap the screen with your stylus, the tapped item is activated. If your device does not accurately respond to screen taps, follow these steps to re-calibrate it: 1. Tap Start > Settings > System tab > Screen. 2. On the General tab, tap Align Screen and follow the on-screen instructions to complete the calibration. Manage screen settings The device's display supports two orientation modes: Portrait and Landscape. To change the orientation, tap the Rotate Screen icon ( ) in the HTC Home's Launcher tab. See "HTC Home" later in this chapter for details. Tip You can also tap Start > Settings > System tab > Screen > General tab to select the screen orientation you want.
-
 1
1 -
2
-
3
-
4
-
5
-
6
-
7
-
8
-
9
-
10
-
11
-
12
-
13
-
14
-
15
-
16
-
17
-
18
-
19
-
20
-
21
-
 22
22 -
 23
23 -
 24
24 -
 25
25 -
 26
26 -
 27
27 -
 28
28 -
 29
29 -
 30
30 -
 31
31 -
 32
32 -
33
-
34
-
35
-
36
-
37
-
38
-
39
-
40
-
41
-
42
-
43
-
44
-
45
-
46
-
47
-
48
-
49
-
50
-
51
-
52
-
53
-
54
-
55
-
56
-
57
-
58
-
59
-
60
-
61
-
62
-
63
-
64
-
65
-
66
-
67
-
68
-
69
-
70
-
71
-
72
-
73
-
74
-
75
-
76
-
77
-
78
-
79
-
80
-
81
-
82
-
83
-
84
-
85
-
86
-
87
-
88
-
89
-
90
-
91
-
92
-
93
-
94
-
95
-
96
-
97
-
98
-
99
-
100
-
101
-
102
-
103
-
104
-
105
-
106
-
107
-
108
-
109
-
110
-
111
-
112
-
113
-
114
-
115
-
116
-
117
-
118
-
119
-
120
-
121
-
122
-
123
-
124
-
125
-
126
-
127
-
128
-
129
-
130
-
131
-
132
-
133
-
134
-
135
-
136
-
137
-
138
-
139
-
140
-
141
-
142
-
143
-
144
-
145
-
146
-
147
-
148
-
149
-
150
-
151
-
152
-
153
-
154
-
155
-
156
-
157
-
158
-
159
-
160
-
161
-
162
-
163
-
164
-
165
-
166
-
167
-
168
-
169
-
170
-
171
-
172
-
173
-
174
-
175
-
176
-
177
-
178
-
179
-
180
-
181
-
182
-
183
-
184
-
185
-
186
-
187
-
188
-
189
-
190
-
191
-
192
-
193
-
194
-
195
-
196
-
197
-
198
-
199
-
200
-
201
-
202
-
203
-
204
-
205
-
206
-
207
-
208
-
209
-
210
-
211
-
212
-
213
-
214
-
215
-
216
-
217
-
218
-
219
-
220
-
221
-
222
-
223
-
224
-
225
-
226
-
227
-
228
-
229
-
230
-
231
-
232
-
233
-
234
-
235
-
236
-
237
-
238
-
239
-
240
-
241
-
242
 |
 |