HP 14-bp100 Maintenance and Service Guide - Page 61
When installing the system board
 |
View all HP 14-bp100 manuals
Add to My Manuals
Save this manual to your list of manuals |
Page 61 highlights
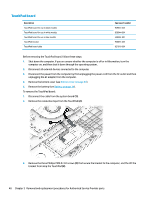
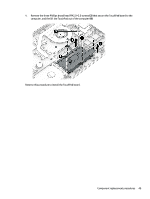
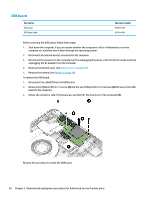
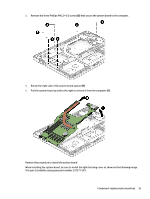
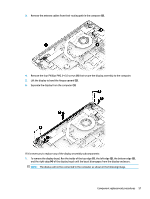
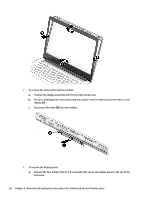
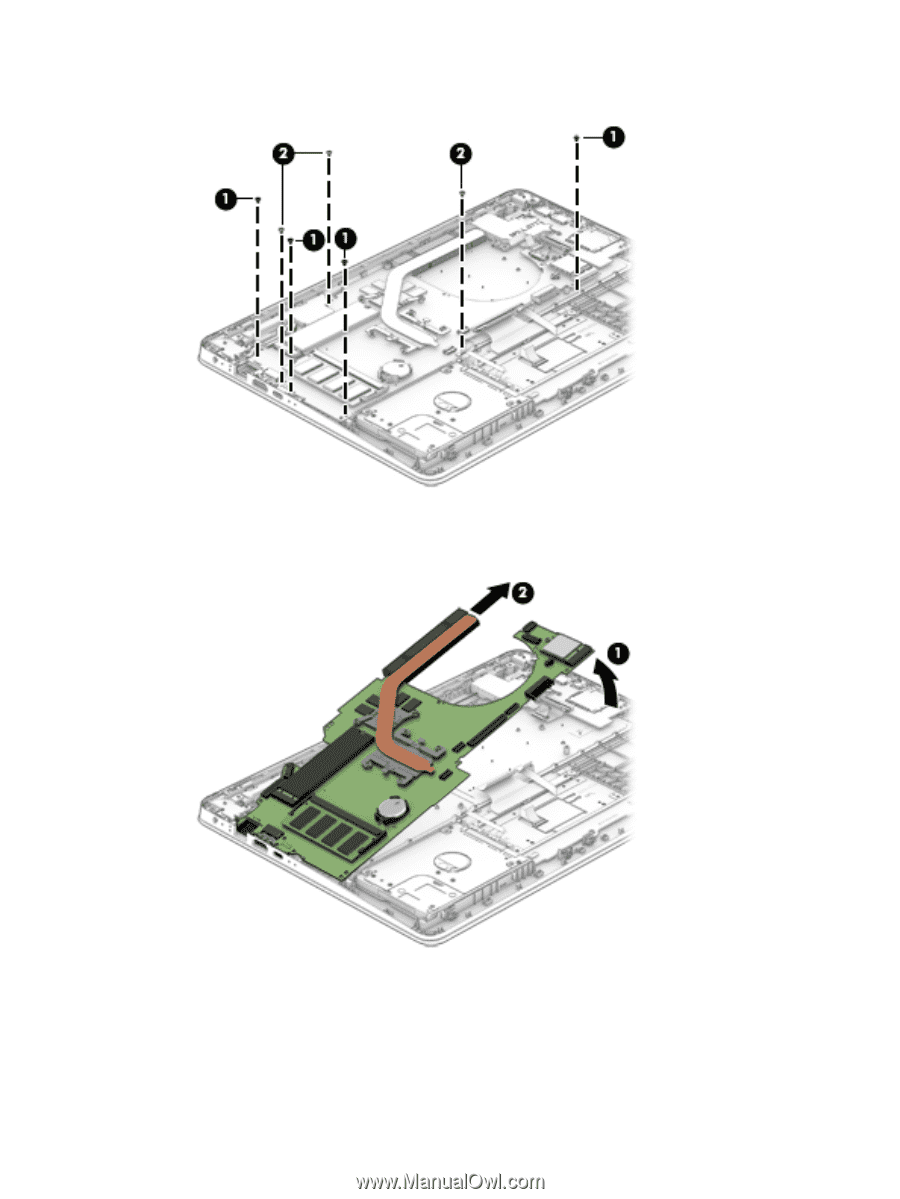
3. Remove the three Phillips PM2.0×3.0 screws (2) that secure the system board to the computer. 4. Rotate the right side of the system board upward (1) 5. Pull the system board up and to the right to remove it from the computer (2). Reverse this procedure to install the system board. When installing the system board, be sure to install the light-blocking cover as shown in the following image. This part is available using spare part number 937271-001. Component replacement procedures 53
-
 1
1 -
2
-
3
-
4
-
5
-
6
-
7
-
8
-
9
-
10
-
11
-
12
-
13
-
14
-
15
-
16
-
17
-
18
-
19
-
20
-
21
-
22
-
23
-
24
-
25
-
26
-
27
-
28
-
29
-
30
-
31
-
32
-
33
-
34
-
35
-
36
-
37
-
38
-
39
-
40
-
41
-
42
-
43
-
44
-
45
-
46
-
47
-
48
-
49
-
50
-
51
-
52
-
53
-
54
-
55
-
 56
56 -
 57
57 -
 58
58 -
 59
59 -
 60
60 -
 61
61 -
 62
62 -
 63
63 -
 64
64 -
 65
65 -
 66
66 -
67
-
68
-
69
-
70
-
71
-
72
-
73
-
74
-
75
-
76
-
77
-
78
-
79
-
80
-
81
-
82
-
83
-
84
-
85
-
86
-
87
-
88
-
89
-
90
-
91
-
92
-
93
-
94
-
95
-
96
-
97
-
98
 |
 |
3.
Remove the three Phillips PM2.0×3.0 screws
(2)
that secure the system board to the computer.
4.
Rotate the right side of the system board upward
(1)
5.
Pull the system board up and to the right to remove it from the computer
(2)
.
Reverse this procedure to install the system board.
When installing the system board, be sure to install the light-blocking cover as shown in the following image.
This part is available using spare part number 937271-001.
Component replacement procedures
53