HP 625 Compaq 325 and 326 Notebook PCs HP 425 and 625 Notebook PCs - Maintenan - Page 75
Remove the palm rest on, Remove the Torx M2.5×6.0 screw that secures the palm rest to the computer.
 |
View all HP 625 manuals
Add to My Manuals
Save this manual to your list of manuals |
Page 75 highlights
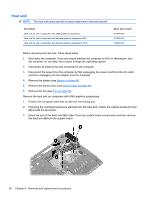
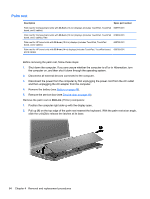
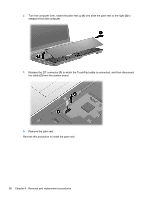
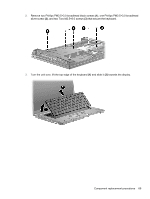
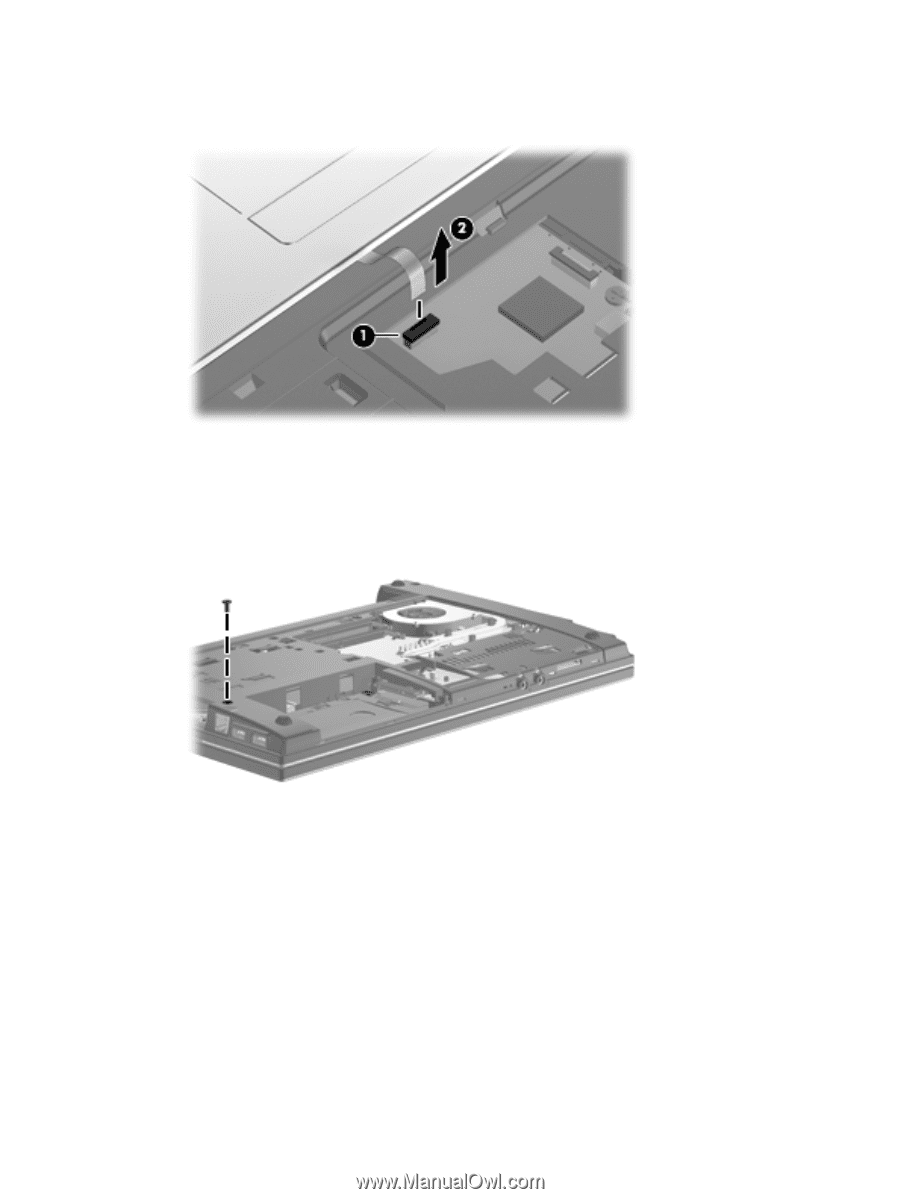
3. Release the ZIF connector (1) to which the TouchPad cable is connected, and then disconnect the cable (2) from the system board. 4. Remove the palm rest. Remove the palm rest on 35.6-cm (14-in) or 33.8-cm (13.3-in) computers: 1. Position the computer upside down with the front toward you. 2. Remove the Torx M2.5×6.0 screw that secures the palm rest to the computer. Component replacement procedures 65
-
 1
1 -
2
-
3
-
4
-
5
-
6
-
7
-
8
-
9
-
10
-
11
-
12
-
13
-
14
-
15
-
16
-
17
-
18
-
19
-
20
-
21
-
22
-
23
-
24
-
25
-
26
-
27
-
28
-
29
-
30
-
31
-
32
-
33
-
34
-
35
-
36
-
37
-
38
-
39
-
40
-
41
-
42
-
43
-
44
-
45
-
46
-
47
-
48
-
49
-
50
-
51
-
52
-
53
-
54
-
55
-
56
-
57
-
58
-
59
-
60
-
61
-
62
-
63
-
64
-
65
-
66
-
67
-
68
-
69
-
 70
70 -
 71
71 -
 72
72 -
 73
73 -
 74
74 -
 75
75 -
 76
76 -
 77
77 -
 78
78 -
 79
79 -
 80
80 -
81
-
82
-
83
-
84
-
85
-
86
-
87
-
88
-
89
-
90
-
91
-
92
-
93
-
94
-
95
-
96
-
97
-
98
-
99
-
100
-
101
-
102
-
103
-
104
-
105
-
106
-
107
-
108
-
109
-
110
-
111
-
112
-
113
-
114
-
115
-
116
-
117
-
118
-
119
-
120
-
121
-
122
-
123
-
124
-
125
-
126
-
127
-
128
-
129
-
130
-
131
-
132
-
133
-
134
-
135
-
136
-
137
-
138
-
139
-
140
-
141
-
142
-
143
-
144
-
145
-
146
-
147
-
148
-
149
-
150
-
151
-
152
-
153
-
154
-
155
-
156
-
157
-
158
 |
 |
3.
Release the ZIF connector
(1)
to which the TouchPad cable is connected, and then disconnect
the cable
(2)
from the system board.
4.
Remove the palm rest.
Remove the palm rest on
35.6-cm
(14-in) or
33.8-cm
(13.3-in) computers:
1.
Position the computer upside down with the front toward you.
2.
Remove the Torx M2.5×6.0 screw that secures the palm rest to the computer.
Component replacement procedures
65