HP BladeSystem bc2500 Setup and Installation Guide HP BladeSystem bc2000 and b - Page 29
Installing the Enclosure into the Rack
 |
View all HP BladeSystem bc2500 manuals
Add to My Manuals
Save this manual to your list of manuals |
Page 29 highlights
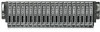
Installing the Enclosure into the Rack The enclosure ships with two different sizes of thumbscrews: ● Size 10-32 thumbscrews with white hexagonal washers, which are compatible with Compaq- branded racks and some HP and third-party racks ● Size M6 thumbscrews with black hexagonal washers, which are compatible with some third-party racks that require metric sizes To replace a thumbscrew: 1. Pull the thumbscrew outward (1). 2. Unscrew the thumbscrew (2) while holding on to the hexagonal washer. 3. Remove the thumbscrew and hexagonal washer (3). 4. Place the hexagonal washer at the back of the hole in the enclosure (1). 5. Insert the screw through the hole in the enclosure. 6. Press the head of the screw inward so that the spring is completely compressed (2). ENWW Installing the Enclosure into the Rack 21
-
 1
1 -
2
-
3
-
4
-
5
-
6
-
7
-
8
-
9
-
10
-
11
-
12
-
13
-
14
-
15
-
16
-
17
-
18
-
19
-
20
-
21
-
22
-
23
-
 24
24 -
 25
25 -
 26
26 -
 27
27 -
 28
28 -
 29
29 -
 30
30 -
 31
31 -
 32
32 -
 33
33 -
 34
34 -
35
-
36
-
37
-
38
-
39
-
40
-
41
-
42
-
43
-
44
-
45
-
46
-
47
-
48
-
49
-
50
-
51
-
52
-
53
-
54
-
55
-
56
-
57
-
58
-
59
-
60
-
61
-
62
-
63
-
64
-
65
-
66
-
67
-
68
-
69
-
70
-
71
-
72
-
73
-
74
-
75
-
76
-
77
-
78
-
79
-
80
-
81
-
82
-
83
-
84
-
85
-
86
-
87
-
88
-
89
-
90
-
91
-
92
-
93
-
94
-
95
-
96
-
97
-
98
-
99
-
100
-
101
-
102
-
103
-
104
 |
 |
