HP Brio 81XX hp brio 81xx, upgrade guide - Page 52
Installing a Floppy Disk Drive, Zip Drive, or Tape Drive, Installing Accessories in Your Computer
 |
View all HP Brio 81XX manuals
Add to My Manuals
Save this manual to your list of manuals |
Page 52 highlights
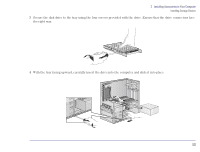
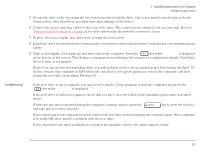
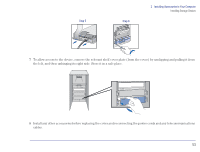
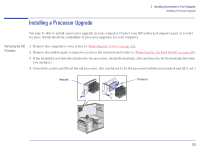
2 Installing Accessories in Your Computer Installing Storage Devices Installing a Floppy Disk Drive, Zip Drive, or Tape Drive 1 Remove the computer's cover (refer to "Removing the Cover" on page 22). 2 Remove the small cover plate on the shelf by unsnapping it first from the right side, and then pulling it out. 3 Check that the mounting rails are attached to the device. If there are no mounting rails attached, use two of the rails supplied with your computer. 4 Slide the drive completely into the shelf. Step 2 Step 4 5 Connect the power and data cables to the rear of the device (the connectors are shaped to go in one way only). Refer to "System Board Connectors" on page 44 for more information about which connectors to use. 6 Secure the device in position using the screws provided with it. 52
-
 1
1 -
2
-
3
-
4
-
5
-
6
-
7
-
8
-
9
-
10
-
11
-
12
-
13
-
14
-
15
-
16
-
17
-
18
-
19
-
20
-
21
-
22
-
23
-
24
-
25
-
26
-
27
-
28
-
29
-
30
-
31
-
32
-
33
-
34
-
35
-
36
-
37
-
38
-
39
-
40
-
41
-
42
-
43
-
44
-
45
-
46
-
 47
47 -
 48
48 -
 49
49 -
 50
50 -
 51
51 -
 52
52 -
 53
53 -
 54
54 -
 55
55 -
 56
56 -
 57
57 -
58
-
59
-
60
-
61
-
62
-
63
-
64
 |
 |
