HP Brocade 8/12c Brocade Network Advisor Migration Guide v11.1x (53-1002321-01 - Page 48
Migrating from Professional to Trial, Copy Data and Settings
 |
View all HP Brocade 8/12c manuals
Add to My Manuals
Save this manual to your list of manuals |
Page 48 highlights
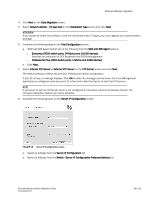
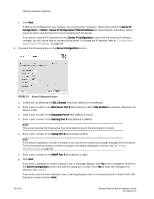
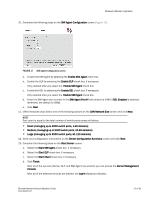
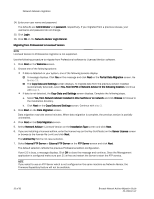
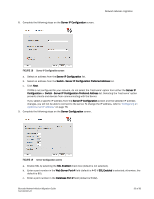
Network Advisor migration c. Enter a port number in the Starting Port # field (default is 24600). NOTE The server requires 16 consecutive free ports beginning with the starting port number. d. Enter a port number in the Syslog Port # field (default is 514). NOTE If the default syslog port number is already in use, you will not receive any syslog messages from the device. To find and stop the process currently running on the default Syslog port number, refer to "Syslog troubleshooting" on page 80. e. Enter a port number in the SNMP Port # field (default is 162). f. Click Next. If you enter a syslog port number already in use, a message displays. Click No on the message to remain on the Server Configuration screen and edit the syslog port number. Click Yes to close the message and continue with step 10. If you enter a port number already in use, a warning displays next to the associated port number field. Edit that port number and click Next. 9. Verify your configuration information on the Server Configuration Summary screen and click Next. 10. Select the Start Client check box, if necessary, on the Start Server screen and click Finish. After all of the Network Advisor services are started, the Log In dialog box displays. 11. Enter your user name and password. The defaults are Administrator and password, respectively. If you migrated from a previous release, your username and password do not change. 12. Click Login. 13. Click OK on the Network Advisor Login Banner. Migrating from Professional to Trial NOTE Trial to Professional migration is not supported. Use the following procedure to migrate from Professional software to Trial software. 1. Click Next on the Welcome screen. 2. Choose one of the following options: • If data is detected on your system, a message displays. Click Yes on the message and click Next on the Partial Data Migration screen. Go to step 13. • If data is not detected, the Copy Data and Settings screen displays. Complete the following steps. a. Select Yes, from Network Advisor installed in this machine or on network and click Browse to browse to the installation directory. b. Click Next on the Copy Data and Settings screen. Continue with step 3. 3. Click Start on the Data Migration screen. Data migration may take several minutes. 48 of 82 Brocade Network Advisor Migration Guide 53-1002321-01
-
 1
1 -
2
-
3
-
4
-
5
-
6
-
7
-
8
-
9
-
10
-
11
-
12
-
13
-
14
-
15
-
16
-
17
-
18
-
19
-
20
-
21
-
22
-
23
-
24
-
25
-
26
-
27
-
28
-
29
-
30
-
31
-
32
-
33
-
34
-
35
-
36
-
37
-
38
-
39
-
40
-
41
-
42
-
 43
43 -
 44
44 -
 45
45 -
 46
46 -
 47
47 -
 48
48 -
 49
49 -
 50
50 -
 51
51 -
 52
52 -
 53
53 -
54
-
55
-
56
-
57
-
58
-
59
-
60
-
61
-
62
-
63
-
64
-
65
-
66
-
67
-
68
-
69
-
70
-
71
-
72
-
73
-
74
-
75
-
76
-
77
-
78
-
79
-
80
-
81
-
82
 |
 |
