HP Brocade 8/12c Brocade Network Advisor Migration Guide v11.1x (53-1002321-01 - Page 79
SAN with SMI Agent Click, Server Configuration
 |
View all HP Brocade 8/12c manuals
Add to My Manuals
Save this manual to your list of manuals |
Page 79 highlights
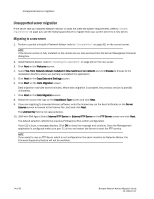
Configuring an explicit server IP address 5. Complete the following steps on the Server IP Configuration screen. FIGURE 39 Server IP Configuration screen a. Select an address from the Server IP Configuration list. b. Select an address from the Switch - Server IP Configuration Preferred Address list. If DNS is not configured for your network, do not select the "hostname" option from either the Server IP Configuration or Switch - Server IP Configuration Preferred Address list. Selecting the "hostname" option prevents clients and devices from communicating with the server. c. Click Next. 6. Click Next on the Server Configuration screen. 7. (SAN with SMI Agent) Click Next on the SMI Agent Configuration screen. 8. Verify your configuration information on the Server Configuration Summary screen and click Next. 9. Click Finish on the Start Server screen. 10. Click Yes on the restart server confirmation message. 11. Enter your user name and password. The defaults are Administrator and password, respectively. 12. Click Login. 13. Click OK on the Login Banner. Brocade Network Advisor Migration Guide 53-1002321-01 79 of 82
-
 1
1 -
2
-
3
-
4
-
5
-
6
-
7
-
8
-
9
-
10
-
11
-
12
-
13
-
14
-
15
-
16
-
17
-
18
-
19
-
20
-
21
-
22
-
23
-
24
-
25
-
26
-
27
-
28
-
29
-
30
-
31
-
32
-
33
-
34
-
35
-
36
-
37
-
38
-
39
-
40
-
41
-
42
-
43
-
44
-
45
-
46
-
47
-
48
-
49
-
50
-
51
-
52
-
53
-
54
-
55
-
56
-
57
-
58
-
59
-
60
-
61
-
62
-
63
-
64
-
65
-
66
-
67
-
68
-
69
-
70
-
71
-
72
-
73
-
 74
74 -
 75
75 -
 76
76 -
 77
77 -
 78
78 -
 79
79 -
 80
80 -
 81
81 -
 82
82
 |
 |
