HP Hx2795b HP iPAQ hx2000 Pocket PC Series Additional Product Information - Page 44
Working with the Contact List, Start > Contacts., Menu > View By > Company., Company
 |
UPC - 882780109827
View all HP Hx2795b manuals
Add to My Manuals
Save this manual to your list of manuals |
Page 44 highlights
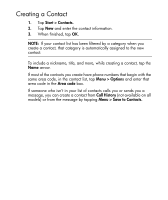
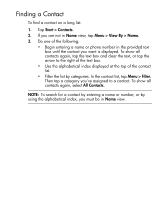
Working with the Contact List There are several ways to use and customize the contact list. Here are a few tips on how to make it work for you. 1. Tap Start > Contacts. 2. In the contact list, do any of the following: • In Name view, search for a contact by entering a name or number, or by using the alphabetical index. • To see a summary of information about a contact, tap the contact. From there you can also make a call or send a message. • To see a list of available actions for a contact, tap and hold the contact. • The last method of communication you used to reach a contact is displayed in the contact list. However, you can change what is displayed. Select a contact and press NAVIGATION left or right until the contact method you want appears with the contact's name. A single letter next to the contact information signifies which method you have chosen. For example, If you choose a contact's e-mail address, the letter e is displayed. • To see a list of contacts employed by a specific company, tap Menu > View By > Company. Then, tap the company name. When working in Company view, you can filter by categories you've assigned to contacts. Then, only the companies with contacts that have that category assigned to them will appear in the list. NOTE: To display a greater number of contacts, tap Menu > Options, select the Show contact names only check box, and clear the Show alphabetical index check box. 35
-
 1
1 -
2
-
3
-
4
-
5
-
6
-
7
-
8
-
9
-
10
-
11
-
12
-
13
-
14
-
15
-
16
-
17
-
18
-
19
-
20
-
21
-
22
-
23
-
24
-
25
-
26
-
27
-
28
-
29
-
30
-
31
-
32
-
33
-
34
-
35
-
36
-
37
-
38
-
 39
39 -
 40
40 -
 41
41 -
 42
42 -
 43
43 -
 44
44 -
 45
45 -
 46
46 -
 47
47 -
 48
48 -
 49
49 -
50
-
51
-
52
-
53
-
54
-
55
-
56
-
57
-
58
-
59
-
60
-
61
-
62
-
63
-
64
-
65
-
66
-
67
-
68
-
69
-
70
-
71
-
72
-
73
-
74
-
75
-
76
-
77
-
78
-
79
-
80
-
81
-
82
-
83
-
84
-
85
-
86
-
87
-
88
-
89
-
90
-
91
-
92
-
93
-
94
-
95
-
96
-
97
-
98
-
99
-
100
-
101
-
102
-
103
-
104
-
105
-
106
-
107
-
108
-
109
-
110
-
111
-
112
-
113
-
114
-
115
-
116
-
117
-
118
-
119
-
120
-
121
-
122
-
123
-
124
-
125
-
126
-
127
-
128
-
129
-
130
-
131
-
132
-
133
-
134
-
135
-
136
-
137
-
138
-
139
-
140
-
141
-
142
-
143
-
144
-
145
-
146
-
147
-
148
-
149
-
150
-
151
 |
 |
