HP Integrity rx8620 Installation (Smart Setup) Guide, Windows Server 2003, v6. - Page 40
Reinstall from a GUI Console, Load the System Image to the Boot Disk
 |
View all HP Integrity rx8620 manuals
Add to My Manuals
Save this manual to your list of manuals |
Page 40 highlights
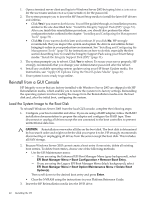
1. Open a terminal server client and log in to Windows Server 2003 by typing Administrator for the user name and Abcdef12 (case-sensitive) for the password. 2. The system prompts you to insert the HP Smart Setup media to install the latest HP drivers and utilities. • Click Yes if you want to do this now. You will be guided through an installation process similar to the one described here: "Install the Integrity Support Pack (ISP)" (page 51). After you finish this reinstallation procedure, you should also perform the other configuration tasks outlined in the chapter: "Installing and Configuring the Management Tools" (page 51) . • Click No if you want to do this later and continue. If you click No, HP strongly recommends that you inspect the system and update the drivers and utilities before bringing it online in your production environment. See "Installing and Configuring the Management Tools" (page 51) for instructions on how to do this, especially the first section describing how to install the Integrity Support Pack using your Smart Setup media: "Install the Integrity Support Pack (ISP)" (page 51). 3. The system prompts you to reboot. Click Yes to reboot. To secure your server properly, HP strongly recommends that you change your Administrator password after the reboot. 4. Install any available operating system updates using your HP Smart Update media. For instructions, see: "Apply OS Updates Using the Smart Update Media" (page 42) 5. Your system is now ready to go online. Reinstall from a GUI Console HP Integrity servers that are factory-installed with Windows Server 2003 are shipped with HP Reinstallation media, which enables you to restore the system to its factory settings. Reinstalling the operating system involves loading the image from the Reinstallation media onto the boot disk and, after the initial boot, configuring the system. Load the System Image to the Boot Disk To reinstall Windows Server 2003 from the local GUI console, complete the following steps: 1. Configure your boot controller and drive. If you are using a RAID adapter, follow the RAID installation documentation to prepare the adapter and configure the RAID type. Then disconnect or unplug all drives except the one connected to the boot controller, to prevent unintentional data loss. CAUTION: Reinstallation overwrites all files on the boot disk. The boot disk is determined by bus search order and might not be the disk you expect it to be. HP strongly recommends disconnecting or unplugging all drives from the server except the boot disk. This includes all SAN storage. 2. Because Windows Server 2003 cannot create a boot entry if one exists, delete all existing boot entries. To delete boot entries, choose one of the following methods: • Use the EFI Maintenance menu: - If you are using the Enhanced EFI Boot Manager Menu (gray background), select EFI Boot Manager Menu > Boot Configuration > Remove Boot Entry. - If you are using the Legacy EFI Boot Manager Menu (black background), select EFI Boot Manager Menu > Boot Option Maintenance Menu > Delete Boot Option(s). Then scroll down to the desired boot entry and press Enter. • Clear the NVRAM using the instructions in your Platform Reference Guide. 3. Insert the HP Reinstallation media into the DVD drive. 40 Installing the OS
-
 1
1 -
2
-
3
-
4
-
5
-
6
-
7
-
8
-
9
-
10
-
11
-
12
-
13
-
14
-
15
-
16
-
17
-
18
-
19
-
20
-
21
-
22
-
23
-
24
-
25
-
26
-
27
-
28
-
29
-
30
-
31
-
32
-
33
-
34
-
 35
35 -
 36
36 -
 37
37 -
 38
38 -
 39
39 -
 40
40 -
 41
41 -
 42
42 -
 43
43 -
 44
44 -
 45
45 -
46
-
47
-
48
-
49
-
50
-
51
-
52
-
53
-
54
-
55
-
56
-
57
-
58
-
59
-
60
-
61
-
62
-
63
-
64
-
65
-
66
-
67
-
68
-
69
-
70
-
71
-
72
-
73
-
74
-
75
-
76
-
77
-
78
-
79
-
80
-
81
-
82
-
83
-
84
-
85
-
86
-
87
-
88
-
89
-
90
-
91
-
92
-
93
-
94
-
95
-
96
-
97
-
98
-
99
-
100
-
101
-
102
-
103
-
104
-
105
-
106
 |
 |
