HP LC2000r HP Netserver LP 1000r (1.13, 1.26 & 1.40 GHz) User Guide - Page 27
See See
 |
View all HP LC2000r manuals
Add to My Manuals
Save this manual to your list of manuals |
Page 27 highlights
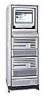
Chapter 3 Installing Mass Storage Devices CAUTION Save the filler panel for future use. If the filler panels are left out of empty drive bays while the Netserver is operating, thermal damage and/or excessive EMI could occur. 2. Remove the SCSI drive from its protective packaging and open the ejector arms as shown in Figure 3-3. The SCSI drive should already be mounted in the Hot Swap mounting tray adapter. a. Place both thumbs in the center opening at the front of the SCSI drive. b. Pull outward on both ejector arms, which moves the locking tabs inward. See Figure 3-4. You should hear the each ejector arm click as you pull it outward. 3. Gently slide the SCSI drive into the chassis, until you feel resistance. See Figure 3-3. The drive will meet resistance about a quarter of an inch before completely seating in the drive bay. 4. Push the drive in firmly (all the way) to seat the drive in the connector on SCSI back plane. Figure 3-3. Inserting the Drive 21
-
 1
1 -
2
-
3
-
4
-
5
-
6
-
7
-
8
-
9
-
10
-
11
-
12
-
13
-
14
-
15
-
16
-
17
-
18
-
19
-
20
-
21
-
 22
22 -
 23
23 -
 24
24 -
 25
25 -
 26
26 -
 27
27 -
 28
28 -
 29
29 -
 30
30 -
 31
31 -
 32
32 -
33
-
34
-
35
-
36
-
37
-
38
-
39
-
40
-
41
-
42
-
43
-
44
-
45
-
46
-
47
-
48
-
49
-
50
-
51
-
52
-
53
-
54
-
55
-
56
-
57
-
58
-
59
-
60
-
61
-
62
-
63
-
64
-
65
-
66
-
67
-
68
-
69
-
70
-
71
-
72
-
73
-
74
-
75
-
76
-
77
-
78
-
79
-
80
-
81
-
82
-
83
-
84
-
85
-
86
-
87
-
88
-
89
-
90
-
91
-
92
-
93
-
94
-
95
-
96
-
97
-
98
-
99
-
100
-
101
-
102
-
103
-
104
-
105
-
106
-
107
-
108
-
109
-
110
-
111
-
112
-
113
-
114
-
115
-
116
-
117
-
118
-
119
-
120
-
121
-
122
-
123
-
124
-
125
-
126
-
127
-
128
-
129
-
130
-
131
-
132
-
133
-
134
-
135
-
136
-
137
-
138
-
139
-
140
 |
 |
