HP LH4r HP Netserver LXr 8500 PCI Hot Plug Utility Guide - Page 6
Opening the PCI Hot Plug Utility, Start, Programs, PCI Hot, Plug Utility, Normal, Link Fault
 |
View all HP LH4r manuals
Add to My Manuals
Save this manual to your list of manuals |
Page 6 highlights
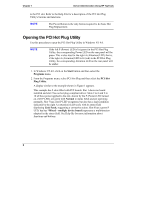
Chapter 1 Server Administration Using HP TopTools to the PCI slot. Refer to the Help File for a description of the PCI Hot Plug Utility's buttons and functions. NOTE The Power Button is the only button required to do basic Hot Plug Replacement. Opening the PCI Hot Plug Utility Use this procedure to open the PCI Hot Plug Utility in Windows NT 4.0. NOTE If the left P (Power) LED is lit (green) in the PCI Hot Plug Utility, the corresponding Power LED on the rear panel will be green. This is also true for the right A (Attention) LED; that is, if the right A (Attention) LED is lit (red) in the PCI Hot Plug Utility, the corresponding Attention LED on the rear panel will be amber. 1. In Windows NT 4.0, click on the Start button and then select the Programs menu. 2. From the Programs menu, select PCI Hot Plug and then select the PCI Hot Plug Utility. A display similar to the example shown in Figure 1 appears. This example has 9 slots filled with PCI boards. Slot 1 shows no board installed and slot 2 has no hot plug compliant driver. Slots 2 to 6 and 9 to 10 all have power applied to the slot, shown by the P (Power) LED turned on, (left P LEDs are green with Normal in status field) and are operating normally. Slot 7 has a left P LED on (green), but also has a fault condition indicated by the right A (Attention) LED (red), with its status field displaying Link Fault, suggesting a corrective action. Slot 8 has a green P LED, but has *Mixed - multiple device board (represents a multifunction adapter) in the status field. See Help file for more information about functions and buttons. 2
-
 1
1 -
 2
2 -
 3
3 -
 4
4 -
 5
5 -
 6
6 -
 7
7 -
 8
8 -
 9
9 -
 10
10 -
 11
11 -
 12
12 -
13
-
14
-
15
-
16
-
17
-
18
-
19
-
20
-
21
-
22
-
23
-
24
-
25
-
26
-
27
-
28
-
29
-
30
-
31
-
32
-
33
-
34
-
35
-
36
-
37
-
38
-
39
-
40
-
41
-
42
-
43
-
44
-
45
-
46
-
47
 |
 |
