HP P4000 9.0.01 HP P4800 G2 SAN Solution for BladeSystem Maintenance Guide (BV - Page 24
Replacing the controller, HP Smart Array P700m controller, CAUTION
 |
View all HP P4000 manuals
Add to My Manuals
Save this manual to your list of manuals |
Page 24 highlights
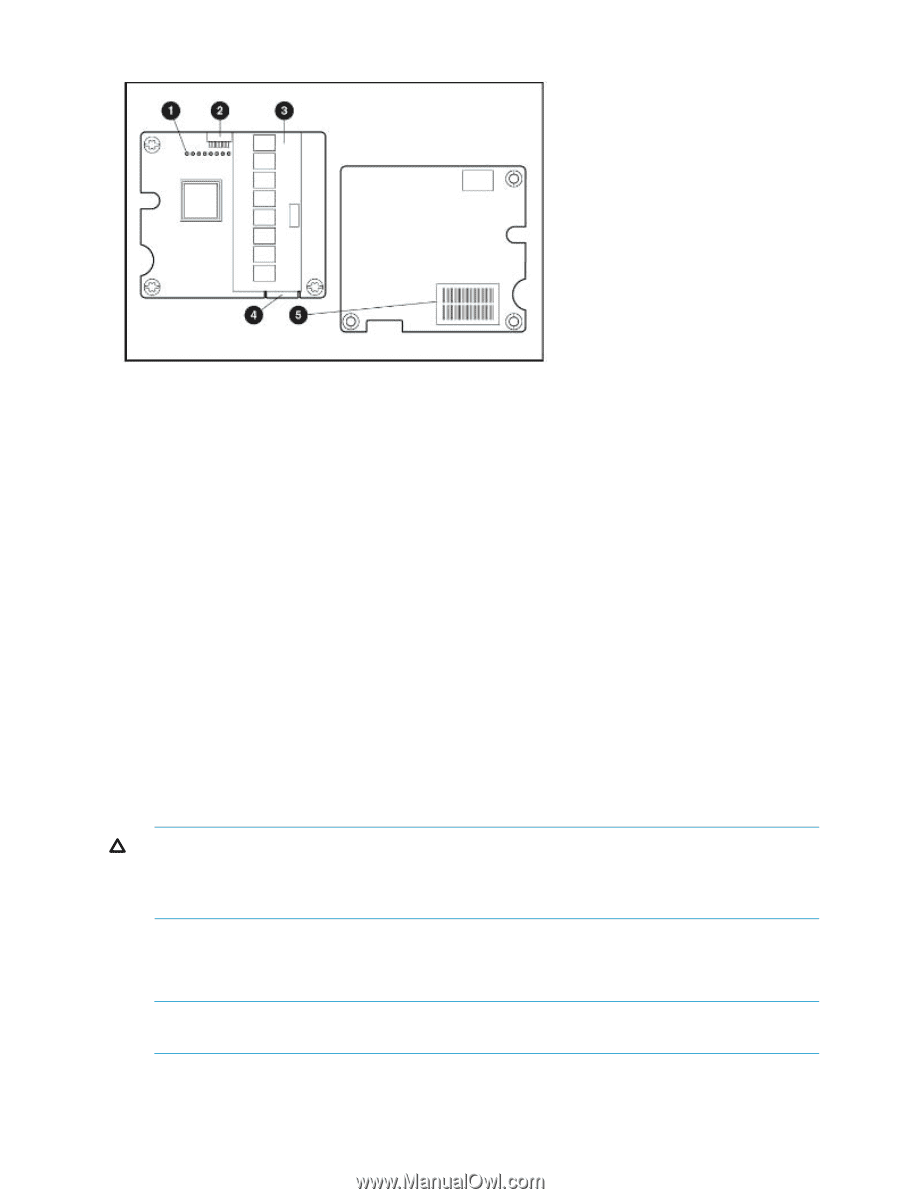
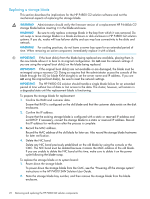
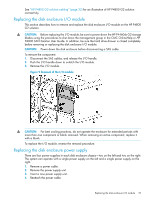
Figure 8 HP Smart Array P700m controller 1. Status LEDs (runtime LEDs) 2. Connector 3. Cache 4. Connector for the cable to the cache 5. Mezzanine connector to system board Replacing the controller The following steps refer to "HP Smart Array P700m controller" (page 24). 1. Verify component failure by checking LED and error messages. To interpret the illumination pattern of these LEDs, see "Runtime LEDs for P700m model" in the HP Smart Array Controllers for HP ProLiant Servers User Guide. 2. Back up all data. 3. Close all applications. 4. Power down the storage blade using the CMC. Wait at least 1 minute for the blade to power down. This procedure flushes all data from the cache. To power down the storage blade from the CMC, see the "Powering off the storage system" instructions in the HP P4000 SAN Solution User Guide. CAUTION: Since the HP P4800 G2 solution uses external data storage, make sure that the storage blade is the first unit to be powered down and the last to be powered up. This precaution ensures that the system does not mark the drives as failed when the storage blade is powered up. 5. Remove the storage blade from the blade enclosure. 6. Remove the access panel from the storage blade. 7. Remove the cache, keeping it connected to the battery. NOTE: When removing the cache to transfer data, the battery must remain connected so that the data is preserved. 8. Remove the existing controller. 9. Install the replacement controller. 24 Removing and replacing the HP P4800 G2 solution components
-
 1
1 -
2
-
3
-
4
-
5
-
6
-
7
-
8
-
9
-
10
-
11
-
12
-
13
-
14
-
15
-
16
-
17
-
18
-
 19
19 -
 20
20 -
 21
21 -
 22
22 -
 23
23 -
 24
24 -
 25
25 -
 26
26 -
 27
27 -
 28
28 -
 29
29 -
30
-
31
-
32
-
33
-
34
-
35
-
36
-
37
-
38
-
39
-
40
-
41
-
42
-
43
-
44
-
45
-
46
-
47
-
48
-
49
-
50
-
51
-
52
-
53
 |
 |