HP P4000 9.0.01 HP P4800 G2 SAN Solution for BladeSystem Maintenance Guide (BV - Page 27
Replacing the disk enclosure I/O module, Remove the I/O module.
 |
View all HP P4000 manuals
Add to My Manuals
Save this manual to your list of manuals |
Page 27 highlights
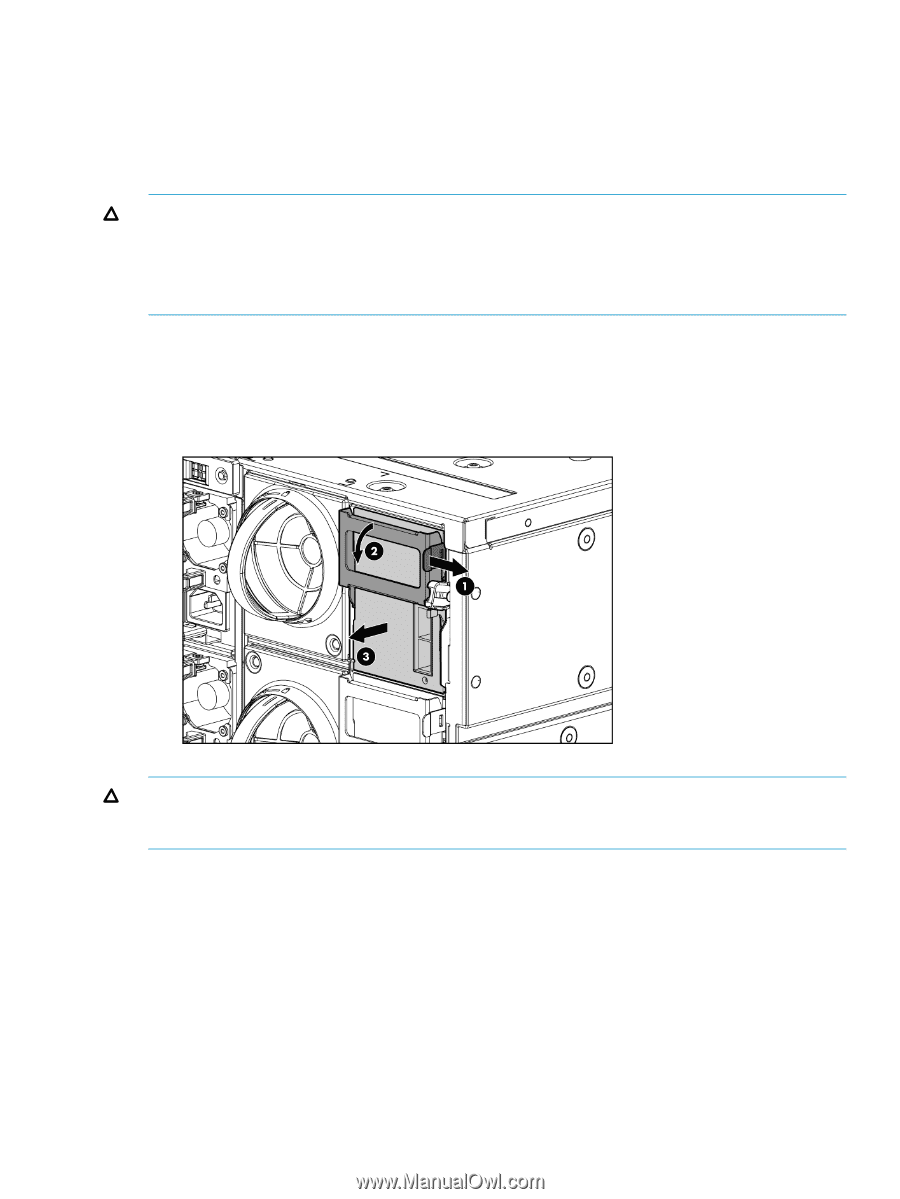
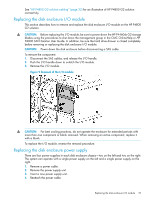
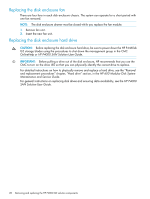
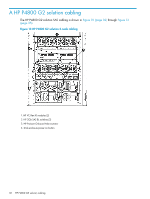
See "HP P4800 G2 solution cabling" (page 32) for an illustration of HP P4800 G2 solution connectivity. Replacing the disk enclosure I/O module This section describes how to remove and replace the disk enclosure I/O module on the HP P4800 G2 solution. CAUTION: Before replacing the I/O module, be sure to power down the HP P4460sb G2 storage blades using the procedures to shut down the management group in the CMC OnlineHelp or HP P4000 SAN Solution User Guide. In addition, be sure the hard drive drawer is closed completely before removing or replacing the disk enclosure I/O module. CAUTION: Power down the disk enclosure before disconnecting a SAS cable. To remove the component: 1. Disconnect the SAS cables, and release the I/O handle. 2. Push the I/O handle down to unlatch the I/O module. 3. Remove the I/O module. Figure 9 Removal of the I/O module CAUTION: For best cooling practices, do not operate the enclosure for extended periods with more than one component or blank removed. When removing an active component, replace it with a blank. To replace the I/O module, reverse the removal procedure. Replacing the disk enclosure power supply There are four power supplies in each disk enclosure chassis-two on the left and two on the right. The system can operate with a single power supply on the left and a single power supply on the right. 1. Remove a power cable. 2. Remove the power supply unit. 3. Insert a new power supply unit. 4. Reattach the power cable. Replacing the disk enclosure I/O module 27
-
 1
1 -
2
-
3
-
4
-
5
-
6
-
7
-
8
-
9
-
10
-
11
-
12
-
13
-
14
-
15
-
16
-
17
-
18
-
19
-
20
-
21
-
 22
22 -
 23
23 -
 24
24 -
 25
25 -
 26
26 -
 27
27 -
 28
28 -
 29
29 -
 30
30 -
 31
31 -
 32
32 -
33
-
34
-
35
-
36
-
37
-
38
-
39
-
40
-
41
-
42
-
43
-
44
-
45
-
46
-
47
-
48
-
49
-
50
-
51
-
52
-
53
 |
 |