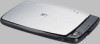
HP Photosmart 1200 HP Photo Scanner 1200 - (English) User Manual - Page 13
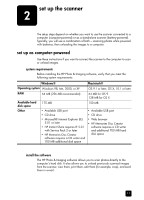
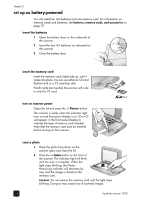
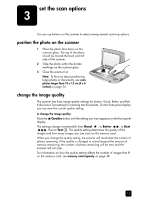
set up the scanner, set up as computer-powered, system requirements, install the software
 |
View all HP Photosmart 1200 manuals
Add to My Manuals
Save this manual to your list of manuals |
Page 13 highlights
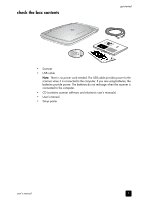
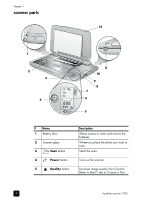
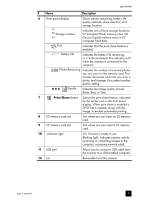
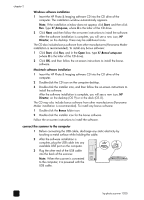
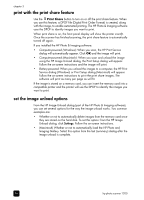
chapter 2 Windows software installation 1 Insert the HP Photo & Imaging software CD into the CD drive of the computer. The installation window automatically appears. Note: If the installation window does not appear, click Start, and then click Run. Type X:\Setup.exe, where X is the letter of the CD drive. 2 Click Next, and then follow the on-screen instructions to install the software. After the software installation is complete, you will see a new icon, HP Director, on the desktop. There may be additional icons. The CD also includes bonus software from other manufacturers (Panorama Maker installation is recommended). To install any bonus software: 1 Click Start, click Run, and in the Open box, type X:\Bonus\setup.exe (where X is the letter of the CD drive). 2 Click OK, and then follow the on-screen instructions to install the bonus software. Macintosh software installation 1 Insert the HP Photo & Imaging software CD into the CD drive of the computer. 2 Double-click the CD icon on the computer desktop. 3 Double-click the installer icon, and then follow the on-screen instructions to install the software. After the software installation is complete, you will see a new icon, HP Director, on the desktop (OS 9) or in the dock (OS X). The CD may also include bonus software from other manufacturers (Panorama Maker installation is recommended). To install any bonus software: 1 Double-click the Bonus folder icon. 2 Double-click the installer icon for the bonus software. Follow the on-screen instructions to install the software. connect the scanner to the computer 1 Before connecting the USB cable, discharge any static electricity by touching a metal surface while holding the cable. 2 After the software installation is complete, plug the USB cable into any available USB port on the computer. 3 Plug the other end of the USB cable into the back of the scanner. Note: When the scanner is connected to the computer, it is powered with the USB cable. 12 hp photo scanner 1200
-
 1
1 -
2
-
3
-
4
-
5
-
6
-
7
-
 8
8 -
 9
9 -
 10
10 -
 11
11 -
 12
12 -
 13
13 -
 14
14 -
 15
15 -
 16
16 -
 17
17 -
 18
18 -
19
-
20
-
21
-
22
-
23
-
24
-
25
-
26
-
27
-
28
-
29
-
30
-
31
-
32
-
33
-
34
-
35
-
36
-
37
-
38
-
39
-
40
-
41
-
42
-
43
-
44
-
45
-
46
-
47
-
48
 |
 |
