HP Photosmart 1200 HP Photo Scanner 1200 - (English) User Manual - Page 18
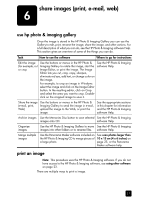
print with the print share feature, set the image unload options, scan photos Windows
 |
View all HP Photosmart 1200 manuals
Add to My Manuals
Save this manual to your list of manuals |
Page 18 highlights
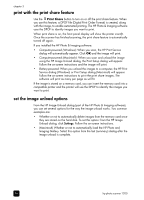
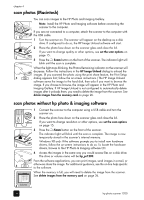
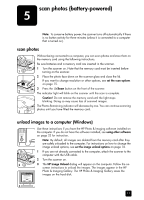
4 scan photos (computer-powered) scan photos (Windows) You can scan images directly into the HP Photo & Imaging Gallery. Note: Install the HP Photo & Imaging software before connecting the scanner to the computer. If you are not connected to a computer, attach the scanner to the computer with the USB cable. 1 Turn the scanner on. Note: If the HP Image Unload window starts, then you have images on the memory card in the scanner. 2 Place the photo face down on the scanner glass, then close the lid. If you want to change quality or other options, see set the scan options on page 15. 3 Press the Scan button on the front of the scanner. The indicator light will blink until the scan is complete.The HP Photo & Imaging Gallery saves the image on the hard disk. On the computer: • You will see a progress dialog as the photo is scanned. • If the HP Print Service dialog appears, then you scanned the photo using the print share feature; follow the on-screen instructions. • The HP Photo & Imaging Gallery will start and the image will appear. 17
-
 1
1 -
2
-
3
-
4
-
5
-
6
-
7
-
8
-
9
-
10
-
11
-
12
-
 13
13 -
 14
14 -
 15
15 -
 16
16 -
 17
17 -
 18
18 -
 19
19 -
 20
20 -
 21
21 -
 22
22 -
 23
23 -
24
-
25
-
26
-
27
-
28
-
29
-
30
-
31
-
32
-
33
-
34
-
35
-
36
-
37
-
38
-
39
-
40
-
41
-
42
-
43
-
44
-
45
-
46
-
47
-
48
 |
 |
