HP Photosmart 1200 HP Photo Scanner 1200 - (English) User Manual - Page 20
scan photos (Macintosh), scan photos without hp photo & imaging software, scan photos
 |
View all HP Photosmart 1200 manuals
Add to My Manuals
Save this manual to your list of manuals |
Page 20 highlights
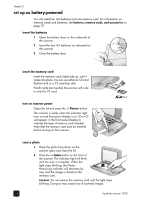
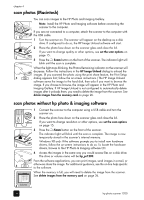
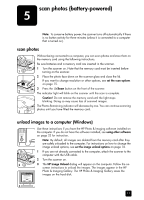
5 scan photos (battery-powered) Note: To conserve battery power, the scanner turns off automatically if there is no button activity for three minutes (unless it is connected to a computer that is turned on). scan photos Without being connected to a computer, you can scan photos and store them on the memory card using the following instructions. Be sure batteries and a memory card are inserted in the scanner. 1 Turn the scanner on. Note that the memory card must be inserted before turning on the scanner. 2 Place the photo face down on the scanner glass and close the lid. If you want to change resolution or other options, see set the scan options on page 15. 3 Press the Scan button on the front of the scanner. The indicator light will blink on the scanner until the scan is complete. Caution! Do not remove the memory card until the light stops blinking. Doing so may cause loss of scanned images. The Photos Remaining indicator will decrease by one. You can continue scanning photos until you have filled the memory card. unload images to a computer (Windows) Use these instructions if you have the HP Photo & Imaging software installed on the computer. If you do not have the software installed, see using other software on page 23 for instruction. Note: By default, all images are deleted from the memory card after they are safely unloaded to the computer. For instructions on how to change the image unload options, see set the image unload options on page 16. 1 If you are not already connected to the computer, attach the scanner to the computer with the USB cable. 2 Turn the scanner on. 3 The HP Image Unload dialog will appear on the computer. Follow the onscreen instructions to unload the images. The images appear in the HP Photo & Imaging Gallery. The HP Photo & Imaging Gallery saves the images on the hard disk. 19
-
 1
1 -
2
-
3
-
4
-
5
-
6
-
7
-
8
-
9
-
10
-
11
-
12
-
13
-
14
-
 15
15 -
 16
16 -
 17
17 -
 18
18 -
 19
19 -
 20
20 -
 21
21 -
 22
22 -
 23
23 -
 24
24 -
 25
25 -
26
-
27
-
28
-
29
-
30
-
31
-
32
-
33
-
34
-
35
-
36
-
37
-
38
-
39
-
40
-
41
-
42
-
43
-
44
-
45
-
46
-
47
-
48
 |
 |
