HP Photosmart 1200 HP Photo Scanner 1200 - (English) User Manual - Page 27
advanced scanning techniques, scan photos larger than 10 x 15 cm (4 x 6 inches), Quality
 |
View all HP Photosmart 1200 manuals
Add to My Manuals
Save this manual to your list of manuals |
Page 27 highlights
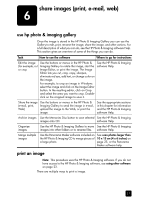
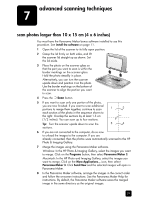
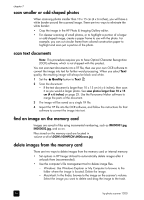
chapter 7 scan smaller or odd-shaped photos When scanning photos smaller than 10 x 15 cm (4 x 6 inches), you will have a white border around the scanned image. There are two ways to eliminate the white border: • Crop the image in the HP Photo & Imaging Gallery editor. • For cleaner scanning of small photos, or to highlight a portion of a larger or odd-shaped image, create a paper frame to use with the photo. For example, you can cut circular frame from colored construction paper to highlight and scan just a portion of the photo. scan text documents Note: This procedure requires you to have Optical Character Recognition (OCR) software, which is not shipped with this product. You can scan text documents into a TIF file, then use your own OCR software to convert the image into text for further word processing. When you select Text quality, the resulting image will always be black and white. 1 Set the Quality button to Text . 2 Scan the document: - If the text document is larger than 10 x 15 cm (4 x 6 inches), then scan it as you would a larger photo. See scan photos larger than 10 x 15 cm (4 x 6 inches) on page 25. Use the Panorama Maker software to merge the parts of the document. 3 The image will be saved as a single TIF file. 4 Import the TIF file into the OCR software, and follow the instructions for that software to convert the image into text. find an image on the memory card Images are saved in files using incremental numbering, such as IM000001.jpg, IM000002.jpg, and so on. Files stored on the memory card are located in volume-or-drive\DCIM\100HPSCN\IM00xxxx.jpg delete images from the memory card There are two ways to delete images from the memory card or internal memory: • Set options in HP Image Unload to automatically delete images after it unloads them (recommended). • Use the computer's file management tool to delete image files. - Windows: Use Windows Explorer or My Computer to browse to the folder where the image is located. Delete the image. - Macintosh: In the finder, browse to the image on the scanner's volume. Select the image you want to delete and drag the image to the trash. 26 hp photo scanner 1200
-
 1
1 -
2
-
3
-
4
-
5
-
6
-
7
-
8
-
9
-
10
-
11
-
12
-
13
-
14
-
15
-
16
-
17
-
18
-
19
-
20
-
21
-
 22
22 -
 23
23 -
 24
24 -
 25
25 -
 26
26 -
 27
27 -
 28
28 -
 29
29 -
 30
30 -
 31
31 -
 32
32 -
33
-
34
-
35
-
36
-
37
-
38
-
39
-
40
-
41
-
42
-
43
-
44
-
45
-
46
-
47
-
48
 |
 |
