HP ProBook 4420s HP ProBook 4320s, 4321s, 4420s, and 4421s Notebook PCs - Mai - Page 134
Recovering, alt+fn+prt sc, fn+prt sc, Edit>Paste - recovery
 |
View all HP ProBook 4420s manuals
Add to My Manuals
Save this manual to your list of manuals |
Page 134 highlights
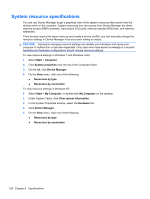
To create a screen shot: 1. Display the screen you want to save. 2. Copy the screen image: To copy only the active window, press alt+fn+prt sc. To copy the entire screen, press fn+prt sc. 3. Open a word-processing document, and then select Edit>Paste. The screen image is added to the document. 4. Save the document. ● When backing up to discs, use any of the following types of discs (purchased separately): CD-R, CD-RW, DVD+R, DVD+R DL, DVD-R, DVD-R DL, or DVD±RW. The discs you use will depend on the type of optical drive installed in your computer. NOTE: DVDs and DVDs with double-layer (DL) support store more information than CDs, so using them for backup reduces the number of recovery discs required. ● When backing up to discs, number each disc before inserting it into the optical drive of the computer. To create a backup using Backup and Restore, follow these steps: NOTE: Be sure that the computer is connected to AC power before you start the backup process. NOTE: The backup process may take over an hour, depending on file size and the speed of the computer. 1. Select Start>All Programs>Maintenance>Backup and Restore. 2. Follow the on-screen instructions to set up your backup, create a system image (select models only), or create a system repair disc (select models only). NOTE: Windows® includes the User Account Control feature to improve the security of your computer. You may be prompted for your permission or password for tasks such as installing software, running utilities, or changing Windows settings. Refer to Help and Support for more information. Recovering In case of system failure or instability, the computer provides the following tools to recover your files. ● Windows recovery tools: You can use Windows Backup and Restore to recover information you have previously backed up. You can also use Windows Startup Repair to fix problems that might prevent Windows from starting correctly. ● f11 recovery tools: You can use f11 recovery tools to recover your original hard drive image. The image includes the Windows operating system and software programs installed at the factory. NOTE: If you are unable to boot (start up) your computer and you cannot use the system repair discs you previously created (select models only), you must purchase a Windows 7 operating system DVD to reboot the computer and repair the operating system. 126 Chapter 7 Backup and recovery
-
 1
1 -
2
-
3
-
4
-
5
-
6
-
7
-
8
-
9
-
10
-
11
-
12
-
13
-
14
-
15
-
16
-
17
-
18
-
19
-
20
-
21
-
22
-
23
-
24
-
25
-
26
-
27
-
28
-
29
-
30
-
31
-
32
-
33
-
34
-
35
-
36
-
37
-
38
-
39
-
40
-
41
-
42
-
43
-
44
-
45
-
46
-
47
-
48
-
49
-
50
-
51
-
52
-
53
-
54
-
55
-
56
-
57
-
58
-
59
-
60
-
61
-
62
-
63
-
64
-
65
-
66
-
67
-
68
-
69
-
70
-
71
-
72
-
73
-
74
-
75
-
76
-
77
-
78
-
79
-
80
-
81
-
82
-
83
-
84
-
85
-
86
-
87
-
88
-
89
-
90
-
91
-
92
-
93
-
94
-
95
-
96
-
97
-
98
-
99
-
100
-
101
-
102
-
103
-
104
-
105
-
106
-
107
-
108
-
109
-
110
-
111
-
112
-
113
-
114
-
115
-
116
-
117
-
118
-
119
-
120
-
121
-
122
-
123
-
124
-
125
-
126
-
127
-
128
-
 129
129 -
 130
130 -
 131
131 -
 132
132 -
 133
133 -
 134
134 -
 135
135 -
 136
136 -
 137
137 -
 138
138 -
 139
139 -
140
-
141
-
142
-
143
-
144
-
145
-
146
-
147
-
148
-
149
-
150
-
151
-
152
-
153
-
154
-
155
-
156
-
157
-
158
-
159
-
160
-
161
-
162
 |
 |