HP Scanjet 200 User Guide - Page 7
Scan pictures and documents, Scan pictures, HP Scanning, Change Settings, Show a preview scan, Finish
 |
View all HP Scanjet 200 manuals
Add to My Manuals
Save this manual to your list of manuals |
Page 7 highlights
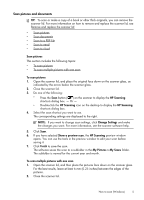
Scan pictures and documents TIP: To scan or make a copy of a book or other thick originals, you can remove the scanner lid. For more information on how to remove and replace the scanner lid, see Remove and replace the scanner lid • Scan pictures • Scan documents • Scan to a PDF file • Scan to email • Scan to cloud Scan pictures This section includes the following topics: • To scan pictures • To scan multiple pictures with one scan To scan pictures 1. Open the scanner lid, and place the original face down on the scanner glass, as indicated by the arrow below the scanner glass. 2. Close the scanner lid. 3. Do one of the following: • Press the Scan button ( ) on the scanner to display the HP Scanning shortcuts dialog box. - Or - • Double-click the HP Scanning icon on the desktop to display the HP Scanning shortcuts dialog box. 4. Select the scan shortcut you want to use. The corresponding settings are displayed to the right. NOTE: If you want to change scan settings, click Change Settings and make the changes you want. For more information, see the scanner software help. 5. Click Scan. 6. If you have selected Show a preview scan, the HP Scanning preview window opens. You can use the tools in the preview window to edit your scan before saving it. 7. Click Finish to save the scan. The software saves the scan to a subfolder in the My Pictures > My Scans folder. The subfolder is named for the current year and month. To scan multiple pictures with one scan 1. Open the scanner lid, and then place the pictures face down on the scanner glass. For the best results, leave at least 6 mm (0.25 inches) between the edges of the pictures. 2. Close the scanner lid. How to scan (Windows) 5
-
 1
1 -
 2
2 -
 3
3 -
 4
4 -
 5
5 -
 6
6 -
 7
7 -
 8
8 -
 9
9 -
 10
10 -
 11
11 -
 12
12 -
13
-
14
-
15
-
16
-
17
-
18
-
19
-
20
-
21
-
22
-
23
-
24
-
25
-
26
-
27
-
28
-
29
-
30
-
31
-
32
-
33
-
34
-
35
-
36
 |
 |