HP Scanjet 200 User Guide - Page 8
Scan documents, To automatically scan multiple pictures using a scanner button, make sure
 |
View all HP Scanjet 200 manuals
Add to My Manuals
Save this manual to your list of manuals |
Page 8 highlights
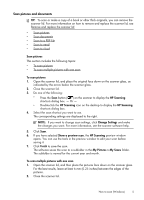
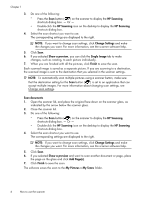
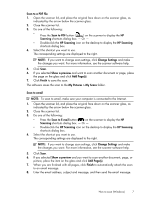
Chapter 1 3. Do one of the following: • Press the Scan button ( ) on the scanner to display the HP Scanning shortcuts dialog box. - Or - • Double-click the HP Scanning icon on the desktop to display the HP Scanning shortcuts dialog box. 4. Select the scan shortcut you want to use. The corresponding settings are displayed to the right. NOTE: If you want to change scan settings, click Change Settings and make the changes you want. For more information, see the scanner software help. 5. Click Scan. 6. If you selected Show a preview, you can click the Single Image tab to make changes, such as rotating, to each picture individually. 7. When you are finished with all the pictures, click Finish to save the scan. Each scanned image is saved as a separate picture. If you are scanning to a destination, the scanned image is sent to the destination that you selected in the scanner settings. NOTE: To automatically scan multiple pictures using a scanner button, make sure that the destination setting for the Scan button ( ) is set to an application that can accept multiple images. For more information about changing scan settings, see Change scan settings. Scan documents 1. Open the scanner lid, and place the original face down on the scanner glass, as indicated by the arrow below the scanner glass. 2. Close the scanner lid. 3. Do one of the following: • Press the Scan button ( ) on the scanner to display the HP Scanning shortcuts dialog box. - Or - • Double-click the HP Scanning icon on the desktop to display the HP Scanning shortcuts dialog box. 4. Select the scan shortcut you want to use. The corresponding settings are displayed to the right. NOTE: If you want to change scan settings, click Change Settings and make the changes you want. For more information, see the scanner software help. 5. Click Scan. 6. If you selected Show a preview and want to scan another document or page, place the page on the glass and click Add Page(s). 7. Click Finish to save the scan. The software saves the scan to the My Pictures > My Scans folder. 6 How to use the scanner
-
 1
1 -
2
-
 3
3 -
 4
4 -
 5
5 -
 6
6 -
 7
7 -
 8
8 -
 9
9 -
 10
10 -
 11
11 -
 12
12 -
 13
13 -
14
-
15
-
16
-
17
-
18
-
19
-
20
-
21
-
22
-
23
-
24
-
25
-
26
-
27
-
28
-
29
-
30
-
31
-
32
-
33
-
34
-
35
-
36
 |
 |