HP TC1100 HP Compaq tc1100 Tablet PC - Maintenance and Service Guide - Page 127
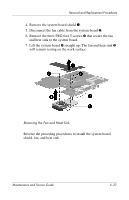
straight up. The fan and heat sink, will remain resting on the work surface.
 |
View all HP TC1100 manuals
Add to My Manuals
Save this manual to your list of manuals |
Page 127 highlights
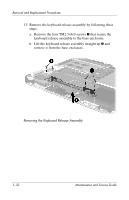
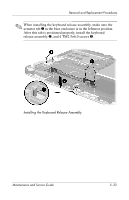
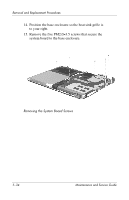
Removal and Replacement Procedures 4. Remove the system board shield 1. 5. Disconnect the fan cable from the system board 2. 6. Remove the three PM2.0×4.5 screws 3 that secure the fan and heat sink to the system board. 7. Lift the system board 4 straight up. The fan and heat sink 5 will remain resting on the work surface. Removing the Fan and Heat Sink Reverse the preceding procedures to install the system board shield, fan, and heat sink. Maintenance and Service Guide 5-37
-
 1
1 -
2
-
3
-
4
-
5
-
6
-
7
-
8
-
9
-
10
-
11
-
12
-
13
-
14
-
15
-
16
-
17
-
18
-
19
-
20
-
21
-
22
-
23
-
24
-
25
-
26
-
27
-
28
-
29
-
30
-
31
-
32
-
33
-
34
-
35
-
36
-
37
-
38
-
39
-
40
-
41
-
42
-
43
-
44
-
45
-
46
-
47
-
48
-
49
-
50
-
51
-
52
-
53
-
54
-
55
-
56
-
57
-
58
-
59
-
60
-
61
-
62
-
63
-
64
-
65
-
66
-
67
-
68
-
69
-
70
-
71
-
72
-
73
-
74
-
75
-
76
-
77
-
78
-
79
-
80
-
81
-
82
-
83
-
84
-
85
-
86
-
87
-
88
-
89
-
90
-
91
-
92
-
93
-
94
-
95
-
96
-
97
-
98
-
99
-
100
-
101
-
102
-
103
-
104
-
105
-
106
-
107
-
108
-
109
-
110
-
111
-
112
-
113
-
114
-
115
-
116
-
117
-
118
-
119
-
120
-
121
-
 122
122 -
 123
123 -
 124
124 -
 125
125 -
 126
126 -
 127
127 -
 128
128 -
 129
129 -
 130
130 -
 131
131 -
 132
132 -
133
-
134
-
135
-
136
-
137
-
138
-
139
-
140
-
141
-
142
-
143
-
144
-
145
-
146
-
147
-
148
-
149
-
150
-
151
-
152
-
153
-
154
-
155
-
156
-
157
-
158
-
159
-
160
-
161
-
162
-
163
-
164
-
165
-
166
-
167
-
168
-
169
-
170
-
171
-
172
-
173
-
174
-
175
-
176
-
177
-
178
-
179
-
180
-
181
-
182
-
183
-
184
-
185
-
186
-
187
-
188
-
189
-
190
-
191
-
192
-
193
 |
 |
Removal and Replacement Procedures
Maintenance and Service Guide
5–37
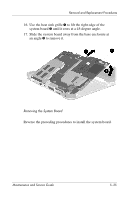
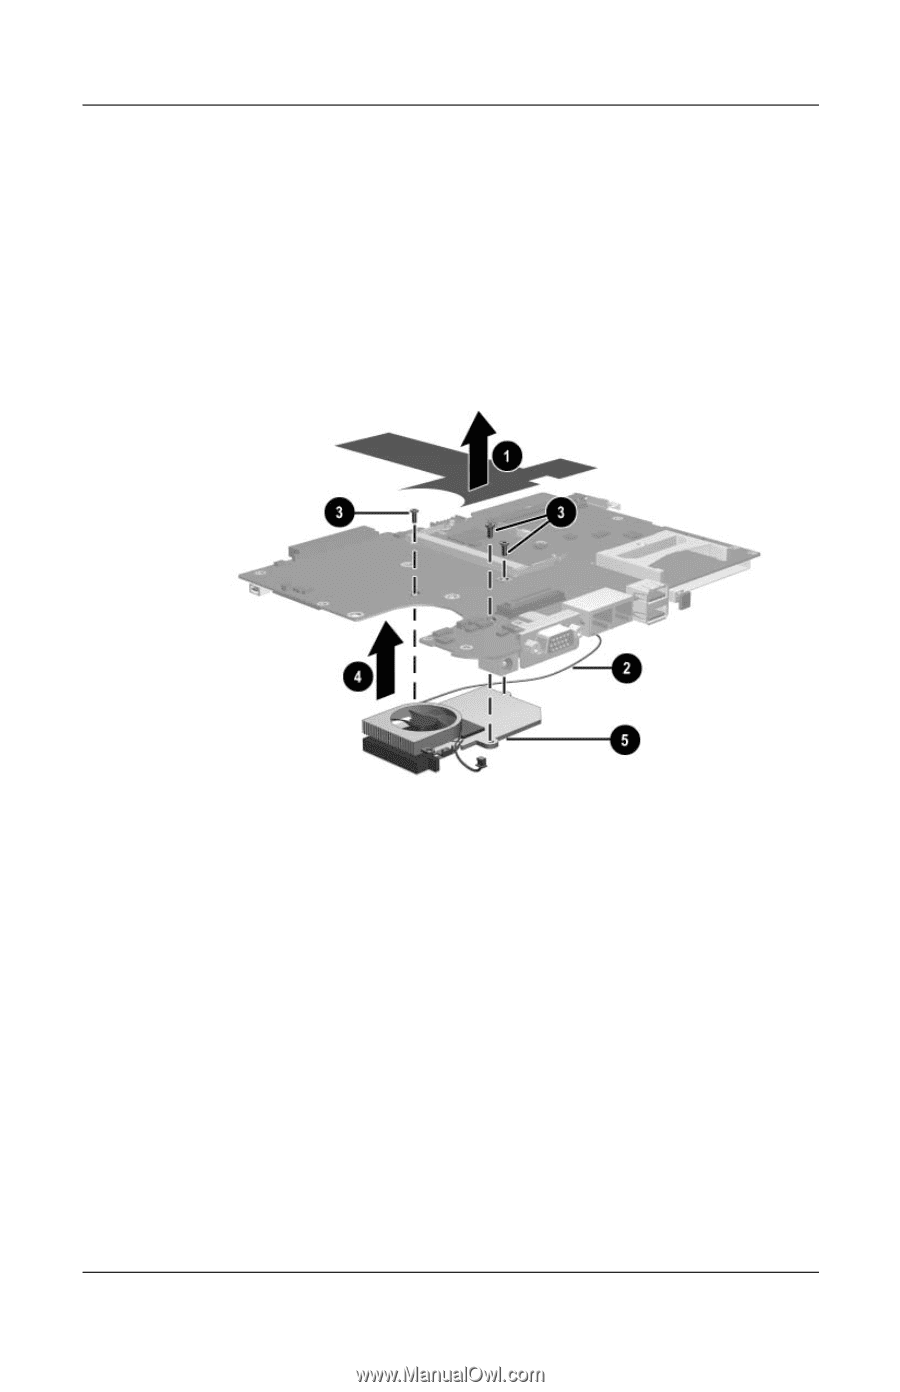
4. Remove the system board shield
1
.
5. Disconnect the fan cable from the system board
2
.
6. Remove the three PM2.0×4.5 screws
3
that secure the fan
and heat sink to the system board.
7. Lift the system board
4
straight up. The fan and heat sink
5
will remain resting on the work surface.
Removing the Fan and Heat Sink
Reverse the preceding procedures to install the system board
shield, fan, and heat sink.