HP Tc2100 hp server tc2100 NOS installation guide (English) - Page 29
Con the network, PHASE 1 - Con Server IP Address
 |
View all HP Tc2100 manuals
Add to My Manuals
Save this manual to your list of manuals |
Page 29 highlights
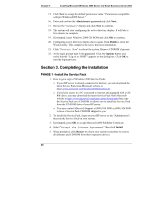
Chapter 3 Installing Microsoft Windows 2000 Server and Small Business Server 2000 Install the Client Utility on a Client Workstation 1. Insert diskette 1 in the target client and run A:\setup.exe 2. Click Continue at the setup screen. 3. Complete the "Name and Organization Information" form. You will be prompted for this information only the first time the diskettes are used. Click OK to validate then OK again to confirm. 4. Click I Agree to accept the license agreement. 5. Click the Large Icon to start installation. 6. Select the installation mode you feel appropriate: all users (Yes) or current user only (No). 7. Insert following diskette(s) when prompted and follow screen instructions. 8. Click OK when the installation is completed then shutdown and restart workstation. Section 2. Configure the network PHASE 1 - Configure Server IP Address During the installation process the system was configured to use DHCP. If no DHCP server is found on the network the system will auto-configure a random IP address to start functioning. It is important that you configure the proper IP address to be able to communicate with the clients: 1. Right click My Network Places | Properties | Local Area Connection on your HP server. NOTE If you HP server host several Network adapters, the window will show one "Local Area Connection" icon for each Network adapter present in the system. Identify the proper adapter by browsing each one. 2. Click Internet Protocol(TCP/IP) | Properties | Use the following IP address. 3. Enter appropriate IP address. 23
-
 1
1 -
2
-
3
-
4
-
5
-
6
-
7
-
8
-
9
-
10
-
11
-
12
-
13
-
14
-
15
-
16
-
17
-
18
-
19
-
20
-
21
-
22
-
23
-
 24
24 -
 25
25 -
 26
26 -
 27
27 -
 28
28 -
 29
29 -
 30
30 -
 31
31 -
 32
32 -
 33
33 -
 34
34 -
35
-
36
-
37
-
38
-
39
-
40
-
41
-
42
-
43
-
44
-
45
-
46
-
47
-
48
-
49
-
50
-
51
-
52
 |
 |
