HP Tc2100 hp server tc2100 NOS installation guide (English) - Page 43
PHASE 2 – Install HP Drivers, For Small Business Suite 5.1
 |
View all HP Tc2100 manuals
Add to My Manuals
Save this manual to your list of manuals |
Page 43 highlights
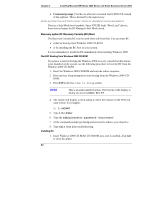
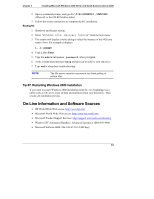
Chapter 4 Installing Novell NetWare 5.1 and Novell Small Business Suite 5.1 For Small Business Suite 5.1 1. A graphic interface will display. Select your language then click Next. 2. When prompted about the DOS Partition, select "Create a new DOS partition" then click Next. hp recommends you keep the default partition size. Click Yes to any warnings. Click Next at the summary screen to reboot and continue the installation. 3. At the Install Type screen, select "Advanced Installation" then click Next. Click Next at the summary screen to continue the installation. 4. Insert your NetWare Small Business Suite 5.1 License diskette and press Enter. The system will proceed with Novell installation. Press F10 to accept the License Agreement. For both NetWare 5.1 and Small Business Suite 5/5.1 5. Press Enter to setup "a new server" then scroll down and choose Continue. 6. Modify or accept the server settings, the regional settings, as well as the mouse and video configuration. PHASE 2 - Install HP Drivers 1. The installation program then detect your hardware and attempt to match the drivers to the hardware. It displays a driver summary screen. 2. If you have an IDE system, press Enter to continue. If you have a SCSI model, you need to install the HP SCSI driver (the SCSI driver proposed by default by NetWare does not install properly): a. Scroll down to chose Modify and press Enter. b. Scroll down to highlight the "Storage Adapters" item and press Enter. c. The installation program displays the drivers detected: a SCSI driver and a generic ATA/IDE/ATAPI Adapter driver (IDEATA.HAM). Press Delete to remove the default SCSI driver. The only remaining driver should be the IDEATA.HAM driver. NOTE Do NOT remove the IDEATA driver because it is used by the CD-ROM Drive. d. Insert HP disk NW#1 (created with the Startup CD) in the floppy drive. 37
-
 1
1 -
2
-
3
-
4
-
5
-
6
-
7
-
8
-
9
-
10
-
11
-
12
-
13
-
14
-
15
-
16
-
17
-
18
-
19
-
20
-
21
-
22
-
23
-
24
-
25
-
26
-
27
-
28
-
29
-
30
-
31
-
32
-
33
-
34
-
35
-
36
-
37
-
 38
38 -
 39
39 -
 40
40 -
 41
41 -
 42
42 -
 43
43 -
 44
44 -
 45
45 -
 46
46 -
 47
47 -
 48
48 -
49
-
50
-
51
-
52
 |
 |
