HP dc73 HP Blade Workstation Client series - Embedded OS Version 10.xx - Page 25
Modifying the settings files, Specifying a new background image
 |
View all HP dc73 manuals
Add to My Manuals
Save this manual to your list of manuals |
Page 25 highlights
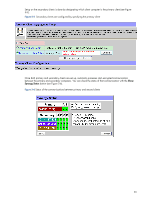
4-7-2 Modifying the settings files The settings files can be modified using any of the following methods: • When installing from a USB key, installation dialogs can be used to set both site and local settings-see Section 7-2, "Example installation from the USB key." Site settings are preserved on the USB key, and are applied to every client system installed subsequently from that USB key. • Use Webmin to change values in the local or site settings files. • Use the PSCP program to copy a customized settings file to the /settings directory of the client. • Upgrade Embedded OS 10.xx on a client with customized settings. Site and local settings will be preserved. The software can also extract an initial set of local settings from a client running older software. IMPORTANT: If the settings files are modified directly (for example, by using PSCP), the new settings will not take affect until after the client computer is rebooted. 4-8 Specifying a new background image The steps to specify a new background image on the monitor are as follows: 1. From another computer on the network, use PSCP to copy the new background image to the client /root/user/backgrounds directory. For example: pscp C:\pics\waterlilies.jpg [email protected]:/root/user/backgrounds 2. Right click on the client desktop. 3. Select Background Image, and then select the tiling method for stretching the image across the monitor. The first image (alphabetically) found in the /root/user/backgrounds directory is used to set the background image. To minimize wasted space, unused background images should be deleted. 25
-
 1
1 -
2
-
3
-
4
-
5
-
6
-
7
-
8
-
9
-
10
-
11
-
12
-
13
-
14
-
15
-
16
-
17
-
18
-
19
-
 20
20 -
 21
21 -
 22
22 -
 23
23 -
 24
24 -
 25
25 -
 26
26 -
 27
27 -
 28
28 -
 29
29 -
 30
30 -
31
-
32
-
33
-
34
-
35
-
36
-
37
-
38
-
39
-
40
-
41
-
42
-
43
-
44
-
45
-
46
-
47
-
48
-
49
-
50
-
51
-
52
-
53
-
54
-
55
-
56
-
57
-
58
-
59
-
60
-
61
-
62
 |
 |
